Annual Siding Inspection & Maintenance Guide for Terre Haute Homeowners
If you want your siding system to last through Indiana’s humidity, wind, rain, and freeze–thaw cycles, an annual inspection is one of the smartest things you can do. Most siding failures in the Wabash Valley start small with tiny gaps, loose trim, bad caulking, clogged weep paths and then slowly turn into soft sheathing, drafts, high energy bills, or hidden rot.
A thorough walkthrough once or twice a year protects your home’s exterior, prevents expensive repairs, and helps your siding reach its full lifespan.
For homeowners in Terre Haute, nearby West-Central Indiana towns, an annual siding inspection comes down to four big goals:
- Keep water out of the wall assembly
- Protect the structure and insulation behind the siding
- Maintain curb appeal and resale value
- Catch small problems before they become major repairs
The rest of this guide walks you through how to inspect your siding like a pro, what early warning signs to watch for on different materials, and when it’s time to call a contractor instead of just grabbing more caulk.
Why Annual Siding Inspections Matter in West-Central Indiana
Our local weather is rough on exteriors. Siding in the Wabash Valley sees heavy rain, strong sun, gusty storms, high summer humidity, and long freeze–thaw seasons. Those conditions work on every little gap, joint, and weak detail in your exterior. If water gets behind the cladding and can’t find its way back out, the wall behind the siding is what pays the price.
Most serious problems start small. One tiny crack at a window corner, a piece of trim that lifts just enough to catch wind-blown rain, or a bottom course that sits too close to the soil can slowly feed moisture into the wall. Because the damage is happening behind the siding, you may not see it until you’re replacing sheathing instead of just a few boards.
A yearly siding inspection gives you a chance to spot repeating patterns: the same window that always shows staining, the same corner that moves after every storm, the same bottom row that never seems to dry out. When you see those patterns early, you can fix the underlying detail instead of just repainting the symptom.
When and How Often to Inspect Siding
For most Terre Haute homes, a full siding inspection once a year is enough, with a quick extra look after big storms or hail. Spring and early fall are ideal: the weather is comfortable, and you can see how your siding handled winter or summer conditions.
Think of your inspection as a loop around the house with four simple rules:
- Walk the entire perimeter at least once from a distance and once up close
- Take notes or photos so you remember where you saw concerns
- Pay extra attention to bottom courses, corners, and roof transitions
- Re-check the worst areas each year to see if they’re getting better or worse
You’re not trying to become a building inspector overnight. You’re just training your eyes to notice what changes from one season to the next.
Step-by-Step Siding Walkthrough Around Your Home
Pros follow a consistent route so they don’t miss anything. You can use the same approach on your home.
1. Start with a wide view of each wall
Stand back far enough to see the whole wall at once. You’re looking for big-picture clues that something is moving or holding moisture:
- Wavy or uneven siding lines instead of straight, clean runs
- Bulges or dips in the wall plane that show movement behind the cladding
- Large discolored patches or streaks under rooflines and window sills
- Areas where panels or boards don’t seem to sit at the same depth
If you can see an issue from across the yard, it usually deserves a closer look. Make a quick note or snap a photo, then move in for more detail.
2. Inspect the bottom two courses and ground contact
The lowest part of your siding sees the most abuse: rain splash, snow piles, ice, sprinklers, weed trimmers, and kicked-up debris. It’s also one of the first places siding fails in our climate.
Get close to the wall and check for:
- Edges that are swollen, crumbly, or flaking (common on fiber cement and LP)
- Panels touching soil, mulch, or concrete without any clearance
- Green or black growth that stays damp long after a rain
- Small cracks or dings from lawn equipment and shovels
If one side of the house looks worse then maybe the windward side or the wall behind a downspout, flag it for extra attention next year. Patterns here usually point to drainage or grading tweaks that could make a big difference.
3. Look at corners, trim boards, and joints
Corners and trim are where different materials meet, and they like to move differently with temperature changes. Tiny gaps in these areas often feed entire wall sections with water.
Walk each outside corner and follow the vertical lines of corner posts and trim. You want those pieces to look straight, snug, and well-supported. Watch for caulk that has fallen out, seams you can see daylight through, and boards that twist or bow.
Pay special attention to butt joints between lap siding boards. Joints should be tight, properly flashed, or well sealed. When gaps widen a little more each year, or boards no longer sit flush with each other, it’s a sign the wall has been taking on moisture or the original fastening wasn’t done right.
4. Check siding around windows and doors
Windows and doors are some of the most common leak points on Terre Haute homes. Any water that sneaks in around the trim can run down into the wall, even if the siding itself looks good.
Move slowly around each opening and check four key details:
- Caulk lines where siding or trim meets the frame should be continuous and flexible
- J-channels on vinyl should be snug, not warped, cracked, or pulled open
- Under each sill, look for faint vertical stains or streaks on the siding face
- Gently press the area below each opening to see if it feels soft or hollow
One window with slight staining might be normal runoff. The same pattern beneath several windows often means the flashing or detailing was never quite right and needs a closer look.
5. Inspect roofline transitions and upper walls
Anywhere a roof meets a wall, the water load increases. If the detailing is wrong in these areas, siding can fail long before it reaches its rated lifespan.
At each roof-to-wall transition, check that:
- There is a visible gap between siding and shingles, not direct contact
- Step flashing is present and tucked under the siding courses
- Any place where a roof dies into a wall has a kick-out flashing, not just an open end
- The siding edges near these transitions aren’t swollen, stained, or peeling faster than the rest of the wall
Even small mistakes here can let water run behind the siding every time it rains. Over a few West-Central Indiana seasons, that adds up to rot, mold, or both.
6. Look behind landscaping, porches, and equipment
The last pass is the one most homeowners skip: the hidden siding behind bushes, next to AC units, and under porch roofs. These shaded areas stay wet longer and are easy to ignore.
Take the time to gently move branches aside or look behind equipment. You’ll often find:
- Algae or mildew streaking where sunlight never quite dries the wall
- Siding that looks much darker or softer than the rest of the house
- Small gaps where deck framing, railings, or porch roofs tie into the siding
- Insect activity or nests near cracks and voids in the cladding
These zones don’t always call for major work, but they reveal where air flow, drainage, or detailing might need minor improvements.
How Different Siding Materials Show Early Trouble
Not all siding “complains” the same way when it starts to fail. Knowing what to look for on your specific material helps you decide whether you’re dealing with normal aging or something more serious.
On vinyl siding, early issues often show up as single panels that have popped loose, small cracks from impacts, or waves where panels were nailed too tightly and can’t move. The vinyl itself doesn’t rot, but water can still get past it and soak the housewrap and sheathing if joints and flashings weren’t done right.
With fiber cement, the edges and fastener points tell the story. When you see edges becoming puffy or rough, paint flaking off at the bottoms, or hairline cracks around nails, it usually means water has been sitting there too long. These boards like proper clearances and sealed cuts; when those details are missing, they start to show it at the edges first.
On LP SmartSide and similar engineered wood products, the focus is on end-grain and cut areas. If those ends weren’t sealed well, they can swell, flake, or soften. You might see subtle ridges at lap joints, or boards that feel spongy when you press near the edges, even if the faces still look decent.
With traditional wood siding, the visual clues are more obvious but easy to shrug off. Peeling paint, dark stains under eaves, and places where your fingernail can dent the wood are all signs that moisture has gotten past the finish. Add in evidence of carpenter ants or other insects, and you can safely assume the area has been damp longer than it should.
Across all these materials, the common theme is consistent: when color, texture, or straightness start to change, there’s usually a moisture or movement story happening behind the scenes.
Cleaning Siding Without Shortening Its Lifespan
Inspection and maintenance go hand in hand. Once you’ve walked the house and noted any concerns, a gentle cleaning makes it easier to see what’s going on and slows down future staining.
For most homes in the Terre Haute area, you can stick to a simple, safe routine:
- Use a garden hose with a light spray instead of a high-pressure nozzle
- Apply a siding-safe cleaner with a soft brush or cloth in manageable sections
- Rinse from top to bottom so dirty water doesn’t streak over cleaned areas
- Clear cobwebs, dirt, and debris from corners, trim, and weep paths
The bigger issue is avoiding habits that damage the siding or the layers behind it. High-pressure washing can drive water behind panels, especially at joints and around openings. Harsh chemicals may strip finishes or discolor certain materials. Scrubbing against the lap direction can force water up into the overlaps instead of allowing it to shed cleanly.
If you’re unsure, check the manufacturer’s care instructions or ask a siding contractor before you bring out any powerful cleaners or tools.
When a Siding Contractor Should Take a Look
A good annual inspection helps you catch obvious issues, but there are times when you need someone who understands how siding, housewrap, flashing, and framing all work together. That “whole wall” view is what separates quick patch jobs from fixes that actually last.
It’s usually worth calling a pro when you notice:
- The same area of siding or trim needing repairs more than once every few years
- Soft spots, bulges, or hollow-sounding sections that suggest deeper damage
- Repeated staining under windows, at corners, or where roofs meet walls
- Drafts, musty smells, or interior wall staining near an exterior trouble spot
In these situations, the problem is normally behind the siding, not on the surface. A contractor who understands building envelopes can check flashings, WRB details, and structural conditions instead of just adding more caulk and hoping for the best.
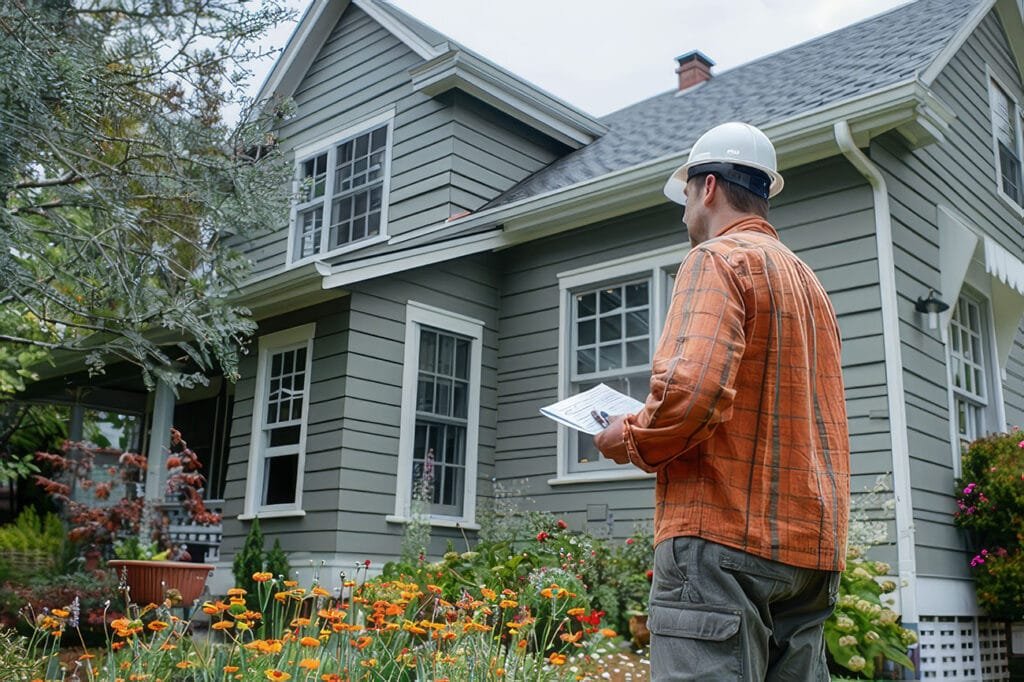
How Patriot Property Pros Handles Siding Inspections
When a homeowner calls Patriot Property Pros for a siding evaluation in Terre Haute or the surrounding Wabash Valley, we’re not just looking for loose panels. We’re trying to understand how your whole wall system is performing.
A typical inspection includes:
- Walking the full exterior to see the siding in relation to roofs, gutters, decks, and grading
- Probing suspicious areas to check for soft sheathing or hidden movement
- Looking closely at window and door details, especially flashing and trim
- Checking bottom courses, splash zones, and any siding that’s too close to soil or hard surfaces
- Reviewing roof-to-wall transitions, soffit and fascia conditions, and kick-out flashing
From there, we lay out your options in plain language. Sometimes it’s a simple repair, like correcting a leaky corner or replacing a few damaged boards. Sometimes it’s a partial replacement in one area that’s failed early. And occasionally, the siding system as a whole has reached the point where replacement is more cost-effective than chasing problems piece by piece.
The key is that every recommendation is based on water management and building-science logic, not just selling more siding.
Frequently Asked Questions
Get Your Siding Checked Before the Next Storm Season
An annual siding inspection is a small habit that can save you from major headaches later. If you’d rather have a pro take the lead or if you’ve already spotted a few of the warning signs above then Patriot Property Pros can help.
We provide detailed siding inspections, honest repair vs. replacement recommendations, and full-scope siding projects for homeowners in Terre Haute, Clinton, Rockville, and the rest of West-Central Indiana.
Serving Terre Haute, Clinton, Rockville, and surrounding areas.