Energy Upgrades for Terre Haute Homes
A tighter, better-insulated home is quieter, more comfortable, and cheaper to run. In West-Central Indiana, the winning sequence is seal first, insulate second, then right-size and modernize HVAC. Do it in this order and you’ll control moisture, stop drafts, and lower bills without overspending on equipment.
Quick answer
Seal leaks first, bring the attic to roughly R-49, then right-size and modernize HVAC. This delivers the biggest comfort and energy savings for Terre Haute homes.
How the building shell really works here
West-Central Indiana’s climate drives air the same way every year: in summer, warm humid air pushes into basements and crawlspaces; in winter, heated air rises and escapes through the attic. That pressure difference is the stack effect which pulls outdoor air in low and leaks conditioned air out high. When the attic hatch isn’t gasketed, recessed can lights aren’t airtight, or top plates and chases are open, thick insulation can’t do its job because moving air bypasses the thermal boundary.
Seal the largest leaks first, especially at the attic and rim joists. Establishing a continuous air barrier before adding insulation stops infiltration, reduces drafts, and lowers the latent load from humidity. With the shell tightened, smaller right-sized HVAC runs longer, steadier cycles at lower fan speeds, which cuts noise, improves comfort room-to-room, and drops utility bills across Vigo County’s cold winters and humid summers.
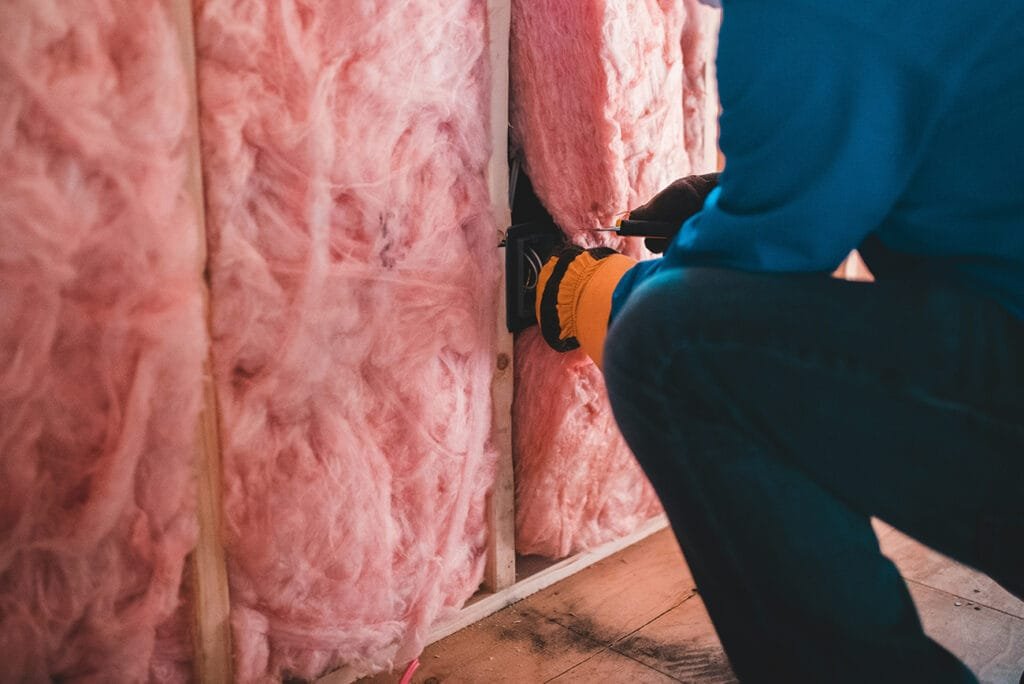
Step 1: Find and prioritize leaks
Start with testing, not guessing. A calibrated blower door sets your baseline leakage rate (ACH50), and an infrared scan reveals where the stack effect is pushing air in low and out high. In many Terre Haute homes, hotspots show up at the attic hatch, leaky recessed cans, open top plates and chases, bath fan housings, plumbing and electrical penetrations, chimney chases, and the basement or crawlspace rim joist. Sealing a few large openings at the top and bottom of the house usually cuts more infiltration than chasing dozens of hairline cracks.
- Test and map
Run the blower door, walk the house with IR or a smoke pencil, and mark each hotspot. Note location and size so you can compare pre- and post-work ACH50. - Rank and plan
Prioritize by impact: seal big holes first (attic and rim joists), then medium penetrations, then pinholes. This sequence delivers the fastest comfort gains and measurable leakage reduction.
Step 2: Create a durable air barrier
Tighten the building at the top and bottom first so insulation and HVAC can actually work. Aim for a continuous air barrier that blocks stack-effect leaks in the attic and at the rim joists, then chase the small penetrations.
- Attic sealing
Cap open chases with foam board and sealant, gasket and insulate the attic hatch, and swap leaky recessed cans for IC-rated, airtight trims. Seal around bath fan housings, top plates, and any plumbing or flue penetrations. - Rim-joist and foundation band
At the basement or crawlspace rim joist, use closed-cell spray foam or rigid foam cut-and-cobble, sealed at all edges. This stops cold drafts and musty odors where framing meets masonry. - Through-wall penetrations
Under sinks, behind tubs, at hose bibs, and around cable, gas, and electrical entries, seal gaps with fire-rated caulk or foam appropriate to the material. Keep outdoor air and pests outside. - Verify continuity
After sealing, run a quick blower-door recheck or use a smoke pencil to confirm you’ve created an unbroken air barrier across the top and bottom of the house.
For attic and rim-joist sealing as part of a larger project, explore our Home Improvements options.
Step 3: Insulate to code or better
With the big leaks sealed, insulation can finally perform. Target roughly R-49 in the attic for Terre Haute’s climate, and make sure air can still move at the eaves so moisture doesn’t get trapped. Keep insulation in direct contact with a continuous air barrier so wind-washing and convective loops don’t rob R-value.
- Attic
Upgrade to about R-49 with blown cellulose or fiberglass after sealing. Install baffles at every eave to maintain soffit-to-ridge ventilation and keep insulation out of the airflow path. - Kneewalls and sloped ceilings
Add a continuous interior air barrier, then rigid foam over studs before dense-pack or batts. Seal edges so moving air can’t bypass the thermal boundary. - Basements
Don’t put fiberglass against concrete. Adhere rigid foam insulation to foundation walls, tape seams, then frame and insulate the stud cavities. This keeps the dew point in the foam, not in the batts. - Crawlspaces
Air seal the rim joists, lay a sealed ground vapor retarder, and consider a sealed or conditioned crawlspace approach. This stabilizes humidity, protects subfloors, and reduces musty odors.
Step 4: Control humidity and ventilation
Tight homes feel great when moisture and fresh air are managed on purpose. Size bath fans correctly, duct them outdoors with smooth, short runs, and use proper exterior caps so moist air actually exits. If you significantly tighten the shell, add deliberate ventilation: continuous low-flow exhaust or a balanced system to supply and exhaust evenly. Aim for 35–50 percent indoor RH year-round; in Terre Haute summers, a dedicated basement dehumidifier often protects finishes, subfloors, and air quality.
- Bath fans
Choose the right CFM for room size, use humidity or timer controls, and verify airflow at the grille. Duct straight to outside, not into attics or soffits. - Kitchen ventilation
Use a vented range hood when possible. Keep runs short and smooth with a tight-closing exterior damper to limit backdrafts and infiltration. - Whole-home strategy
After air sealing, consider continuous low-flow exhaust or a balanced system for steady fresh air without big pressure swings. - Moisture targets
Track RH with simple sensors. Hold roughly 35–45 percent in winter to avoid window condensation and 45–50 percent in summer, often with a basement dehumidifier.
Step 5: Right-size and modernize HVAC
After the shell is tighter and better insulated, the old equipment size is almost always wrong, our General Contractor team runs a fresh Manual J/S/D to match the new loads.Run a fresh Manual J load calculation based on the new leakage and R-values, then select equipment with Manual S and verify the ductwork with Manual D. In many Terre Haute homes, the result is a smaller system that runs longer, quieter cycles and actually improves comfort while cutting bills.
- Confirm the numbers
Recalculate heating and cooling loads, measure duct leakage, and check external static pressure and available CFM. Document the new design targets. - Fix the air delivery
Seal and balance ducts, add return air where rooms are starved, and correct undersized trunks or restrictive filters. Aim for healthy static pressure so coils and heat exchangers perform. - Pick the right system
Consider cold-climate heat pumps or dual-fuel setups sized to the new loads, with SEER2/HSPF2 efficiencies that fit your budget. Right-sized tonnage prevents short cycling and humidity issues. - Align controls with comfort
Set up smart thermostats, stage or modulate as designed, and verify dehumidification and fan profiles. In boiler or radiator homes, pair envelope upgrades with a heat-pump water heater and room-by-room strategies for even comfort.
Step 6: Commission and monitor
Lock in the gains with simple commissioning. Program a smart thermostat, set humidity targets for winter and summer, and create fan schedules that match your new loads. Drop a couple of temperature and RH sensors in the main living area and the basement so you can see trends, spot drift, and catch problems early. Finish with a post-work blower door and duct test to document ACH50 and leakage reductions, proof that the shell and distribution are performing.
- Dial in controls
Set heating and cooling setpoints, humidity targets (about 35–45% winter, 45–50% summer), and fan profiles. Enable dehumidification and staging or modulation features as designed. - Verify performance
Place sensors, check room-to-room deltas during peak weather, and re-test with a blower door and duct tester. Keep the results; they help with resale, rebates, and future tune-ups.
Signs it’s working
You’ll know the upgrades are paying off when these changes show up in day-to-day living and on your utility statements.
- Room-to-room temperatures feel more even, with fewer hot or cold spots
- Equipment runs longer, steadier cycles instead of short cycling
- Winter windows stay clear while indoor RH holds above 30 percent
- Summer RH stays under 50 percent without that sticky feeling
- Utility bills drop when you compare similar-weather months
- Less dust appears as bypass leaks and duct leakage go down
Common mistakes to avoid
These are the issues that erase comfort gains and waste money. Skip them and your upgrades will perform as intended.
- Adding insulation before sealing the attic
Air leaks bypass insulation and fuel stack effect. Seal big openings, then insulate. - Venting bath fans into the attic or soffits
Moist air condenses on roof framing and ruins insulation. Always duct to the exterior with a proper cap. - Putting fiberglass directly on concrete walls
Fiberglass traps moisture against cold masonry. Use rigid foam against the foundation, then frame and insulate. - Skipping a new load calculation after tightening the shell
Post-upgrade loads are smaller. Re-run Manual J or you’ll oversize equipment and short cycle. - Ignoring duct leakage and return air sizing
Leaky or starved ducts kill comfort and efficiency. Seal, balance, and add returns where rooms are underfed. - Choosing filters that are too restrictive
Ultra-high MERV without enough filter area chokes airflow. Match MERV to duct capacity and static pressure.
Local notes for Vigo County homes
Older attic details and open chases mean the top of the house is priority one. Terre Haute’s mixed-humid climate rings windy winters and muggy summers, so tighten the attic and rim joists, then manage seasonal moisture in basements and crawlspaces. If solar is on your roadmap, shrinking loads now lets you install a smaller, cheaper array later.
- Winter wind and stack effect
Gasket and insulate attic accesses, seal can lights and top plates, and cap chases to stop warm air from escaping on gusty days. - Summer humidity and basements
Plan for a dedicated basement dehumidifier July–September and keep RH near 45–50 percent to protect finishes and subfloors. - Crawlspace strategy
Air seal rim joists, lay a sealed ground vapor retarder, and consider a sealed or conditioned crawlspace to cut musty odors and condensation. - Freeze–thaw durability
Use rigid foam on foundation walls, maintain clear soffit ventilation with baffles, and keep bath and kitchen vents terminating outdoors to avoid wet insulation.
What it typically costs
Budgets vary with access, story count, existing insulation, and electrical or roofing constraints. These ballparks reflect common scopes we see in Vigo County after an on-site test and inspection.
- Testing and diagnostics
Blower door with IR scan: $250–$600. Duct leakage test if needed: $200–$450. Establishes baseline ACH50 and duct losses. - Priority air sealing
Attic chases, top plates, hatch gasketing, rim-joist sealing: $800–$2,500 for most homes. Bigger or complicated attics can run higher. - Attic insulation upgrade
Bring to about R-49 with blown cellulose or fiberglass: $1.50–$3.50 per sq ft, including baffles and air-barrier touch-ups. - Basement and crawlspace moisture/insulation
Rigid foam on foundation walls, rim-joist sealing, ground vapor retarder, basic conditioning: $3–$7 per sq ft of treated area. Standalone dehumidifier installed: $900–$2,000. - Duct sealing and airflow balance
Seal accessible ducts, add or resize returns, set airflow and static pressure: $700–$2,000, more if major trunk resizing is required. - Right-sized HVAC replacements
Cold-climate heat pump or dual-fuel system matched to new loads: roughly $6,500–$14,000+ depending on tonnage, efficiency (SEER2/HSPF2), and duct modifications.
We scope these after testing so you pay for measured results, not guesses. If you want, I can convert this into a simple comparison table for your post.
Frequently Asked Questions On Energy Upgrades In Terre Haute
Will a heat pump work in Terre Haute winters
Modern cold-climate units handle most days; a dual-fuel setup covers rare deep freezes while keeping costs predictable.
Do I need new ducts after tightening the house
Not always. Sealing and balancing plus added return air often fix comfort without full replacement.
Is spray foam required
No. Use it surgically at rim joists and complex chases; blown cellulose or fiberglass works well in attics after sealing.
What R-value should my attic have here
Around R-49 is a solid target after air sealing and baffles to maintain soffit ventilation.
How do I control humidity in summer
Run a dedicated basement dehumidifier and verify bath and kitchen fans vent outdoors; aim for 45–50 percent RH.
When will I see savings
Usually on the next billing cycle, with bigger gains after a full season at the new leakage rate and insulation levels.
Ready to cut drafts and lower bills
Let’s test, seal, insulate, and right-size in the right order. We’ll start with a quick in-home assessment, run targeted diagnostics, and give you a clear plan for attic and rim-joist sealing, R-value upgrades, ventilation, and HVAC tuning. You’ll get a written scope, transparent pricing, and a timeline that works around your schedule.
Serving Terre Haute, Clinton, Rockville, and surrounding areas.