Garage Makeovers in Terre Haute: Storage, Flooring, and Lighting
Turn your garage into clean, bright, usable space. We plan and build garage makeovers in Terre Haute with wall storage that fits your tools, durable floors that resist salt and oil, and high-CRI LED lighting you can actually see by—plus safe power, weather sealing, and insulation that handle Indiana’s freeze–thaw and summer humidity.
Quick Answer
- Plan zones first: parking, workbench, lawn/bike, and seasonal storage
- Choose durable flooring: epoxy or polyaspartic coatings, or PVC tiles for fast installs
- Add bright, low-glare lighting: ~50–80 lumens/sq ft with 4000–5000K high-CRI LEDs
- Upgrade power safely: GFCI/AFCI where required, dedicated 20A circuits, 240V options
- Seal and insulate: weatherstripping, door seals, rim-joist air-sealing, targeted insulation
- Keep it organized: slatwall, cabinets, overhead racks, and labeled bins for easy access
How We Design Your Garage (Terre Haute Approach)
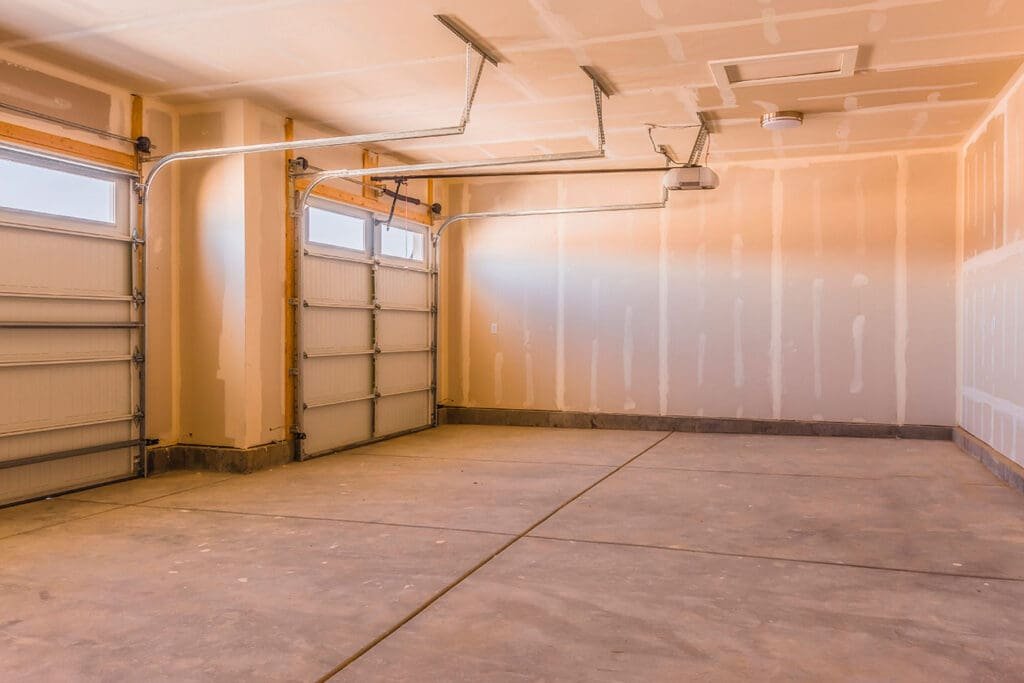
Every garage makeover starts with how you live and work. We measure bay width and depth, opener rails, door tracks, ceiling height, and joist layout, then inventory what actually lives in your space—totes, bikes, yard tools, sports gear, a second fridge, and the tools you grab weekly. From there we map clean “zones” that separate car parking from projects, and fast-access gear from deep storage. The result is a garage that opens to clear floor space, a workbench that’s ready to use (not buried), and storage that adapts as your needs change—optimized for Indiana’s freeze–thaw, humidity, and road salt.
Design checklist
- Precise measurements: bay dimensions, clearance for doors/hoods, opener rail shadows, ceiling joists for overhead racks
- Workflow zoning: parking, workbench, lawn/bike zone, and seasonal storage with obvious paths between
- Right-sized storage: slatwall or pegboard for daily tools, closed cabinets for chemicals/chargers, overhead racks for totes
- Lighting plan: even general light plus task light at the bench to eliminate shadows and glare
- Power access: outlets where you work (not behind cabinets), charging shelf for batteries, room for future circuits
- Flexibility built-in: adjustable hooks/shelves, labeled bins, and space reserved for new tools or gear changes
Storage Systems That Fit Your Stuff
For garage makeovers in Terre Haute, the winning formula is wall-first, ceiling-second, floor-last. Use vertical surfaces for daily tools, reserve overhead space for seasonal totes, and keep the slab open for cars and safe movement. This improves organization, lighting, and cleaning—and makes the space feel bigger.
Core storage choices
- Slatwall vs pegboard: Slatwall handles heavier, repositionable hooks, shelves, and bins; pegboard shines behind the workbench for dense tool layouts and easy silhouettes.
- Cabinets and drawers: Lockable base units for paints/solvents, wall cabinets for chargers and PPE, and shallow drawers for hand tools keep dust down and clutter hidden.
- Overhead storage racks: Lag into joists with verified load ratings; store seasonal totes above hood height while maintaining clearance for door tracks and openers.
- Bike and lawn zones: Vertical bike hooks with tire bumpers, track systems for rakes/shovels/trimmers, and a mower parking pad keep traffic lanes clear.
- Workbench essentials: A 1.5–2″ top, a sturdy vise corner, magnetic tool strip, under-cabinet task light, and a dedicated charging shelf with cable management.
- Labeling and bins: Clear totes, shelf tags, and QR labels linked to a simple contents list so you can find and return items fast.
Placement cues
- Maintain clear walkways around cars and the bench; plan reach heights so everyday tools sit between waist and eye level.
- Keep outlets accessible—don’t trap receptacles behind fixed cabinets; leave space for future circuits or a subpanel.
- Set overhead rack setbacks from the door and opener rails; confirm joist locations and fastener type before loading.
- Group by use frequency: fast-access items on slatwall near the bench, deep storage up high, and messy lawn gear near the exterior door.
Flooring That Survives Indiana Weather
In Terre Haute, garage floors deal with freeze–thaw cycles, road salt, hot-tire pickup, and oil. A good garage makeover pairs the right system with proper prep so coatings bond, tiles stay flat, and cleanup is easy.
Best garage flooring options
- Epoxy coatings: Cost-effective, chemical-resistant, and seamless. Great when you can allow multi-day cure time and do meticulous prep.
- Polyaspartic coatings: Faster cure and excellent UV stability with strong hot-tire resistance; ideal for cold-weather installs and quick turnarounds.
- Hybrid systems: Epoxy build coat for adhesion/leveling plus a polyaspartic topcoat for durability, gloss retention, and stain resistance.
- Interlocking PVC tiles: Fastest install, forgiving over stained or hairline-cracked slabs, replaceable tile-by-tile, and sound-deadening underfoot.
Prep that makes coatings last
- Grind or etch the concrete: Diamond grinding is preferred; acid etch only where appropriate and neutralize thoroughly.
- Degrease and rinse: Lift oil and brake-fluid residues so the coating can wet the surface evenly.
- Repair defects: Fill cracks, spalls, and divots; honor control/expansion joints so the slab can move.
- Moisture test: Check vapor transmission (in-slab RH or calcium-chloride test). If high, add a moisture-tolerant primer or vapor-barrier epoxy.
- Check environment: Apply within specified slab/air temps and humidity; avoid dew-point conditions that cause blush or adhesion issues.
- Mask edges and plan exits: Tape baseboards/thresholds and sequence your application so you don’t paint yourself in a corner.
Performance and maintenance tips
- Traction + durability: Broadcast decorative flake for slip resistance; choose an oil- and salt-resistant topcoat.
- Entry protection: Use parking mats at the apron to catch meltwater and road salt in winter.
- Gentle cleaning: Hose and squeegee or neutral cleaner; avoid harsh solvents and pressure-washing at coating edges.
- Tile care: For PVC tiles, leave small expansion gaps at walls/columns and replace individual tiles if damaged.
Lighting You Can Actually See By
Dark garages create shadows and mistakes. For garage makeovers in Terre Haute, aim for clear, even light you can work under—without glare. We target roughly 50–80 lumens per sq ft using high-CRI (90+) LEDs so paint colors, wiring, and stains read accurately. A 4000–5000K color temperature keeps detail crisp without looking icy; 4000K is great all-around, 5000K suits detail work at the bench.
Key specs to hit
- Brightness: 50–80 lm/sq ft (≈5–8 foot-candles). Example: a 22×22 two-car (484 sq ft) needs ~24,000–39,000 total lumens.
- Color quality: CRI 90+ with low flicker for accurate finishes and less eye strain.
- Color temp: 4000K for general work, 5000K at the bench; avoid mixed temps in the same zone.
- Fixture type: Linear LED shop lights or vapor-tight strips with diffusers to soften hotspots.
- Ratings: Damp-location rated fixtures; DLC-listed drivers for efficiency and reliability.
- Dimming: If you want dimming, choose fixtures rated for it (many shop lights aren’t). 0–10V or compatible smart dimmers only.
Layout and control that prevent shadows
- Even rows: Run linear fixtures in two or three rows parallel to the garage door; space rows ~1–1.2× mounting height for uniformity.
- Clear the opener: Place rows so the opener rail doesn’t cast a shadow stripe down the center bay.
- Bench zone: Add a dedicated row slightly in front of the workbench edge so light falls forward onto the surface, not your eyes.
- Task add-ons: Under-cabinet LED strips and a magnetic gooseneck light at drill press/saw kill hard shadows.
- Zoned switching: Separate bench, parking, and storage so quick trips don’t light the whole bay.
- Smart + sensors: Motion sensors at entries and a smart switch or plug for schedules/scenes; vacation mode boosts security.
Low-glare setup in practice
- Paint ceilings/walls a light matte to bounce light and reduce contrast.
- Mount fixtures with diffusers and avoid placing LEDs directly in your sightline at the bench.
- Keep lens covers clean; dust and bugs increase glare and cut output.
Power, Outlets, and Charging
Plan electrical while walls are open so your garage makeover in Terre Haute is safe, code-friendly, and future-proof. We check panel capacity, map where you actually work, and design dedicated circuits that won’t trip when a freezer kicks on mid-cut. All new receptacles in garages get GFCI/AFCI protection, wet-location (WR) and tamper-resistant (TR) devices where exposed, and clean routing in conduit or surface raceway for finished walls. If you need an EV charger, compressor, welder, or a 240V table saw, we size the circuit properly, verify breaker and receptacle type, and pull permits for inspection in Vigo County.
What we spec
- Dedicated circuits: 20A for the bench and dust collection, a separate 15/20A for freezer/fridge, and a lighting circuit that doesn’t die if a tool trips
- 240V options: EVSE (often NEMA 14-50 or hardwired per manufacturer), 6-50/14-30 for compressor or welder, with conductor size and breaker matched to load and run length
- GFCI/AFCI protection: required in garages; WR/TR receptacles, in-use covers where needed, and boxes with correct fill and clamps
- Subpanel readiness: short feeder runs, labeled breakers, 20–30% spare spaces for future gear, and clear working clearance at the panel
- Convenient layout: receptacles every 4–6 ft along the bench at 42–48″ height, ceiling drops for cord/air reels, and a wall-mounted charging shelf for tool batteries
- Cable management: EMT or surface raceways on finished walls, protected home-run routes to minimize voltage drop, and neatly labeled circuits for fast troubleshooting
Pro tip: If the run to a 240V outlet is long or you’ll add high-draw tools later, upsize conductors to reduce voltage drop and keep motors happy.
Insulation, Air-Sealing, and Comfort
In Vigo County, a tight shell matters more than brute heating or cooling. We air-seal rim joists, top plates, and penetrations first, then add insulation where it moves the needle most: ceilings under living space, garage walls you plan to finish, and insulated doors. For year-round use, a small ductless mini-split or unit heater plus a dehumidifier keeps the space comfortable and protects tools from rust and condensation.
- Air-seal first: foam and caulk at gaps, penetrations, and between drywall and framing
- Smart insulation: focus on the lid (ceiling), then shared walls; consider insulated glass for side doors or windows
- Moisture and vapor: stop bulk water at the threshold, slope apron away from the bay, and manage RH with dehumidification in summer
- Spot ventilation: a through-wall fan near paint/solvent storage for occasional purges, with make-up air considered
- Condensation control: target 45–55% RH to protect finishes, fasteners, and electronics
- Comfort set-up: mini-split sizing based on use, not only square footage; ceiling fans help destratify heat in winter
Doors, Thresholds, and Weatherproofing
A quiet, tight garage feels finished and stays cleaner. In Terre Haute’s wind-driven rain and summer humidity, small gaps around the big door let in dust, pests, and moisture that rust tools and wrinkle floor coatings. We start by tuning the door and opener for smooth travel, then chase every visible light gap with proper seals, thresholds, and adjustments so the bay closes evenly and stays dry.
Good weather sealing starts at the perimeter. Fresh side and top weatherstripping (plus a properly compressed top astragal) stops drafts; a low-profile ramp threshold at the slab blocks wind-blown water and road spray. If your driveway pitches toward the bay, a narrow trench drain at the apron carries water away. An insulated door reduces temperature swings and noise, while correct spring tension and nylon rollers protect the opener and make the door whisper-quiet. Smart openers with battery backup, Wi-Fi control, and motion-activated LEDs add convenience and security without extra switches.
What we check and upgrade
- Perimeter weatherstripping: replace brittle seals, square the tracks, and set even compression so no daylight shows along the sides or header
- Threshold + drainage: bond a low ramp threshold with polyurethane adhesive; add a trench drain at the apron where grade sends water toward the bay
- Door insulation and balance: select insulated panels (higher R-value), set spring tension, align tracks, and swap to nylon rollers for quiet operation
- Smart openers: Wi-Fi/app control, battery backup, and integrated LED lighting with motion for hands-free entry
- Side doors and windows: upgrade leaky units to energy-efficient replacements; use tempered/ safety glass where code requires near doors and floor areas
- Pest defense: door sweeps on man doors, screened vents, and sealed penetrations around pipes/low-voltage lines to block insects and rodents
Pro cues to keep: do the “dollar-bill test” on side seals, re-caulk threshold edges after the first week, and re-torque hinge/track fasteners each fall so Indiana’s freeze–thaw doesn’t open new gaps.
Workflow and Organization That Sticks
The best garage is the one you actually keep tidy. We design your layout around real paths—from the driveway to the mudroom door—so there’s a clear drop zone for muddy boots, a workbench that’s already lit and powered, and wall storage that keeps floor space open for cars and safe movement. Fast-grab tools live on slatwall or a pegboard “shadow board,” chemicals and paints go in closed cabinets, seasonal totes move to overhead racks, and a wall-mounted charging station keeps batteries topped up without cord clutter.
Labels and simple visual cues make everything easier to return. Clear bins with shelf tags or QR labels act like a map, a rolling staging cart prevents project sprawl across the floor, and a small whiteboard near the bench keeps tasks visible. In Indiana’s freeze–thaw and summer humidity, add a boot tray and door mat at the entry, keep a broom and shop-vac within reach, and run dehumidification so road salt and moisture don’t corrode tools and finishes.
Make-it-stick habits
- End-of-day “5-minute reset”: put tools back on the shadow board, empty the staging cart, quick sweep or shop-vac
- Label everything: bins, shelves, and drawers; use QR codes that link to a simple contents list
- Charge zone discipline: one shelf with a power strip, cable clips, and timers for batteries—no chargers on the bench
- Floor stays clear: if it touches the floor, it’s on casters or a dolly (tool chest, compressor, staging cart)
- Dirty/clean split: boot tray and rag bin at the door; clean rags and PPE stored near the bench, not with solvents
- Seasonal swap: top-shelf or overhead totes rotate twice a year so summer gear isn’t underfoot in winter
Typical Garage Makeover Costs in Terre Haute
Here are realistic, 2025-ready ballparks for garage renovations in Vigo County. Final pricing varies with bay size, slab condition, electrical scope, and storage selections, but these ranges reflect common projects we build locally.
Tiered Project Ranges
| Scope | What’s Included | Typical Range |
|---|---|---|
| Storage refresh | Measured layout, slatwall or pegboard, a few cabinets, bin/label system, workbench tweaks | $1,200–$4,800 |
| Floor upgrade (2-car) | Epoxy/polyaspartic coating or interlocking PVC tiles, standard prep, trims | $1,800–$5,500 |
| Lighting + basic power | High-CRI LED rows, task lights at bench, a few GFCI receptacles, tidy raceway | $600–$2,500 |
| Full makeover | Zone planning, storage + floor + lighting + dedicated circuits, weather sealing | $6,500–$15,000+ |
What Affects Price
- Slab prep and repairs: grinding, crack/spall repair, moisture mitigation
- Finish level: polyaspartic topcoats, cabinet grade, nylon door rollers
- Electrical scope: subpanel, 240V EV/compressor/welder, run lengths
- Storage capacity: linear feet of slatwall, cabinet count, rack load ratings
- Access and timeline: clear-out, staging space, weather/cure scheduling
- Permits and inspections: new circuits, subpanel, structural door changes
Quick Itemized Ballparks
| Item | Unit | Typical Price |
|---|---|---|
| Slatwall + hooks/shelves | Per 8′ section installed | $350–$800 |
| Wall/overhead cabinets | Each, installed | $220–$650 |
| Overhead ceiling racks | Each, lagged into joists | $250–$600 |
| Epoxy + polyaspartic hybrid | 2-car, typical prep | $2,600–$4,800 |
| Interlocking PVC tiles | 2-car, trims/ramps included | $3,200–$5,000 |
| LED lighting package | 2–3 rows + bench task | $450–$1,400 |
Size Cues
- 1-car ≈ 12×22 (260–300 sq ft)
- 2-car ≈ 20–22×22–24 (420–520 sq ft)
- Coatings price mainly by prep + square footage
- Electrical adds scale with circuit count + run length
How to use these numbers: Start with a scope that matches your goals. If your slab needs extra repair or you want premium finishes (polyaspartic topcoat, high-end cabinets), expect to sit on the upper half of the range. If access is easy and electrical is light, you’ll land toward the lower half. When you’re ready, we’ll measure, confirm prep needs, and give you a line-item estimate so you can scale storage, flooring, and lighting to your budget.
Timeline and Our Process
Most garage makeovers in Terre Haute move quickly once materials are staged. We coordinate around Indiana weather, epoxy/polyaspartic cure windows, and any permits or inspections, then finish with a clean handoff and care guide so your space stays looking new.
6-step process
- Site visit and discovery (30–60 min): measure bay and ceiling height, photograph zones, confirm slab condition, panel capacity, and storage needs
- Design and line-item estimate (24–72 hrs): layout with zones for parking, workbench, bikes/lawn gear; options for flooring, lighting, and power upgrades
- Prep and clear-out (½–1 day): protect walls and doors, mask edges, stage materials, and set temporary storage so work areas stay safe and tidy
- Flooring install (1–3 days for coatings; same-day for tiles): slab grinding/etch, crack repair, moisture check; epoxy base with polyaspartic topcoat or interlocking PVC tiles with trims
- Electrical and lighting (½–1½ days): dedicated circuits, GFCI/AFCI receptacles, bench/task lighting, labeled breakers; permits and inspection scheduled when required
- Doors, weatherproofing, and finish (½ day): tune opener and springs, replace weatherstripping/thresholds, adjust tracks, then dusk lighting check, labeling, and care instructions
What can extend the timeline
- High slab moisture requiring vapor-tolerant primer or extra dry time
- Panel upgrades, long wire runs, or adding a 240V circuit for EV/compressor
- Special-order cabinets, slatwall, or custom color flake selections
- Cold or humid weather that narrows coating application windows
How we keep it smooth
- One point of contact with text/email updates at each milestone
- Permit coordination with Vigo County when new circuits or a subpanel are added
- Dust control, daily cleanup, and protected traffic paths so you can still access essentials
- Final walk-through and warranty details, plus a simple care schedule for floors, lighting, and seals
Permit and Code Notes
We keep your garage makeover inspection-ready by following local rules and the National Electrical Code (NEC). In practice, that means pulling permits when circuits change, using the right safety devices (GFCI/AFCI, WR/TR), and documenting everything so an inspector can verify work quickly.
When permits are typically required
- New branch circuits or a subpanel, including any 240V line for EV charging, a compressor, welder, or table saw
- Extending wiring to new receptacle locations or adding new lighting circuits (not just swapping a fixture)
- Any work that alters the service or requires panel space reconfiguration/load calculations
- Exterior wiring (trenching to outbuildings) or adding receptacles outdoors
What usually doesn’t need a permit
- Like-for-like swaps of light fixtures on the same circuit and wattage
- Replacing a receptacle/switch with the same rating (e.g., 15A→15A), including WR/TR device upgrades
- Installing storage systems (slatwall, cabinets, racks) with no electrical changes
- Adding plug-in smart controls (smart plugs/switches) that don’t modify permanent wiring
Inspection-ready checklist we follow
- Protection devices: GFCI/AFCI where required in garages; WR/TR receptacles; in-use (“bubble”) covers outdoors
- Conductor sizing & terminations: correct wire gauge, torque to spec, proper box fill and listed cable clamps
- Grounding/bonding: continuous equipment ground, bonded metal boxes/raceways, correct pigtails
- Routing & support: staples within code spacing, bushings at knockouts, protect cables from physical damage
- Panel details: labeled circuit directory, handle ties where needed, working clearance maintained (~30″ wide × 36″ deep × 6′-6″ high)
- Documentation: permit on site, simple one-line or circuit map, and photos of concealed runs before close-up
Safety basics we never skip
- GFCI/AFCI on all new garage receptacles; dedicated 20A circuits for bench tools; separate circuits for freezer/dust collection
- Proper devices: WR/TR receptacles where exposed; damp-/wet-rated fixtures as applicable
- Load planning: panel capacity check, voltage-drop consideration on long runs, and future-proofing for 240V
- Call 811 before any digging/trenching for outdoor circuits
Bottom line: new circuits, subpanels, and 240V lines usually need a permit and inspection; simple like-for-like swaps typically don’t. We handle permits, coordinate with Vigo County, and deliver clean, code-right work that passes the first time.
Common Mistakes to Avoid
Avoid these six pitfalls to keep garage makeovers in Terre Haute safe, durable, and easy to live with.
- Burying outlets behind cabinets: Don’t cover receptacles and then string power strips across the bench. Plan dedicated 20A circuits and accessible GFCI/AFCI-protected outlets at 42–48″ along the work zone.
- Skipping slab prep before coatings: Coatings peel without diamond grinding/etching, crack repair, and a moisture test. Proper prep prevents hot-tire pickup and road-salt damage.
- Dim, low-CRI lighting: Too few lumens and poor color rendering make detail work frustrating and unsafe. Target ~50–80 lm/sq ft with high-CRI (90+) LEDs at 4000–5000K and add task lights at the bench.
- Overloading one circuit: Running the bench, freezer, and dust collection on a single line invites nuisance trips and heat at connections. Use dedicated circuits, correct wire gauge, and labeled breakers; add 240V where needed.
- Ignoring air-sealing and humidity: Without sealing rim joists and managing RH, condensation and rust attack tools and finishes. Add weatherstripping, dehumidification, and venting where solvents/paint are stored.
- Using plastic anchors for overhead racks: Ceiling storage must be lagged into joists with verified load ratings and safety pins. Confirm fastener type, spacing, and clearances for door tracks and opener rails.
Frequently Asked Questions On Garage Makeovers In Terre Haute
What’s the best garage flooring for salt and oil?
For Terre Haute winters, a hybrid coating—epoxy base with a polyaspartic topcoat—handles hot-tire pickup, road salt, and oil stains while staying easy to clean. If you want minimal downtime or a reversible option, interlocking PVC tiles work well and individual tiles can be replaced later.
How bright should garage lighting be for projects?
Plan ~50–80 lumens per sq ft with CRI 90+ LEDs at 4000–5000K. Example: a 22×22 (≈484 sq ft) two-car garage needs roughly 24,000–39,000 total lumens. Add task lights at the bench and keep the bench on its own switch/zone.
Will I need permits for outlets or lighting changes?
New circuits, subpanels, or 240V lines almost always need permits and an inspection in Vigo County. Like-for-like fixture swaps typically don’t, but we verify locally and make the work inspection-ready.
Do I need to etch or grind before coating?
Yes. Diamond grinding (or acid etch where appropriate), crack/spall repair, and a moisture test are essential for adhesion. Skipping prep is the fastest path to peeling.
Can I add 240V for an EV, welder, or compressor?
Yes—if your panel has capacity. We install a dedicated 240V circuit (correct breaker/receptacle type), size conductors for run length to reduce voltage drop, and pull permits as required in Vigo County.
How long does a 2-car garage makeover take?
A light refresh finishes in 1–2 days. Coatings with full prep often run 2–3 days. A full storage + floor + lighting + power makeover typically takes 3–5 days, depending on slab prep, permits, and cure times.
Need further assistance?
Unsure about something? Get in touch with us for a personalized consultation.
Get Your Garage Makeover Plan & Estimate
Turn clutter into clear floor space with wall storage that fits, a tough, easy-clean floor, and high-CRI lighting you can actually see by. We’ll measure, design, and deliver a transparent quote you can scale to your budget.
Serving Terre Haute, Clinton, Rockville, and surrounding areas.