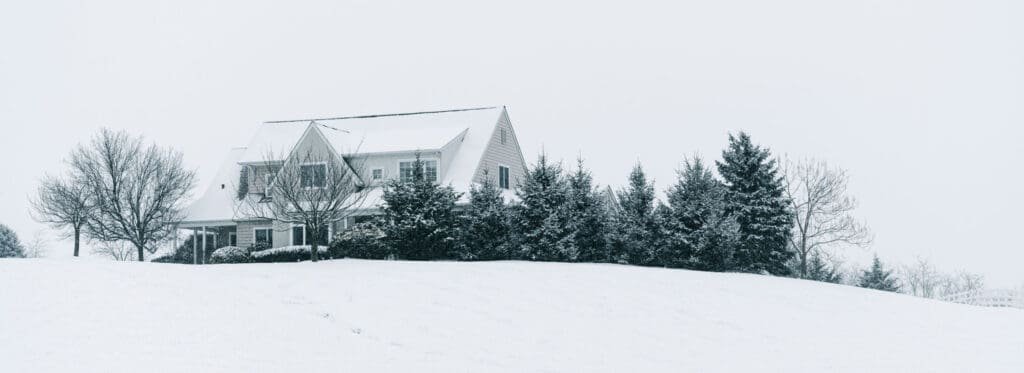
How to Winterize Your House in Terre Haute, Indiana [2025 Guide]
Beat Wabash Valley cold snaps with a practical, local checklist. This guide shows you how to winterize your house in Terre Haute—seal drafts, prevent frozen pipes, reduce ice dams, and tune your HVAC before the first hard freeze. Clear DIY steps, costs, and when to call a pro.
Terre Haute Winterization Checklist: Start Here
Terre Haute winters bring quick cold snaps and messy freeze–thaw cycles. This Terre Haute winterization checklist shows you how to winterize your house in Terre Haute the right way—seal drafts with weatherstripping, protect plumbing to prevent frozen pipes, improve attic insulation and ventilation for ice dam prevention, and tune HVAC, gutter cleaning, and downspout extensions so you save on heating before the first hard freeze across the Wabash Valley.
Table of Contents
At-a-Glance: 10 Big Wins for Winterizing Terre Haute Homes
Use these quick wins to cut drafts, prevent frozen pipes, reduce ice dams, and lower heating bills across the Wabash Valley.
- Seal door and window drafts with fresh weatherstripping and a snug attic-hatch gasket
- Air-seal attic penetrations, then add insulation with clear soffit baffles for ventilation
- Protect plumbing in garages, crawl spaces, and exterior walls; insulate lines and block nearby drafts
- Clean gutters, add downspout extensions, and correct grading to move meltwater away
- Schedule a fall HVAC tune-up, replace filters, and set a smart thermostat program
- Prevent ice dams via attic air-sealing, added insulation, clear ventilation, and safe roof-raking after storms
- Improve entry safety with brighter lighting, tightened rails, and non-slip mats at doors and steps
- Fix the worst window and door offenders first: re-caulk trim, refresh door sweeps, add film kits
- Prep garage and outbuildings: weatherstrip doors, insulate exposed lines, review generator safety
- Build a winter readiness kit and document equipment labels and utility shutoffs
STEP 1 of 10
1) Seal Drafts Where They Start
Drafts are the fastest way heat escapes in older Wabash Valley homes. Start here to winterize your house in Terre Haute efficiently, cut energy waste, and make rooms feel warmer without cranking the thermostat.

Mini-Checklist
- Door weatherstripping
- Door sweep
- Interior trim caulk
- Low-expansion foam
What To Do
Install fresh weatherstripping on exterior doors, add a snug door sweep, and re-caulk trim gaps at leaky doors and windows. Use low-expansion foam where utilities penetrate the shell (cable, hose bibs, gas line). Don’t skip the attic hatch, add a compressible gasket and an insulated cover.
Why It Matters
Air sealing reduces uncontrolled air exchange that drives up heating costs and causes cold spots. Tightening the envelope also helps upstream fixes (like attic insulation) perform closer to spec and reduces ice-dam risk.
Where Leaks Usually Hide
- Door jambs and thresholds, especially older weatherstripping that’s flattened
- Window interior trim and meeting rails where paint/caulk has cracked
- Attic hatch perimeters and pull-down stairs
- Plumbing, cable, and dryer penetrations through walls and floors
- Rim joists in the basement or crawl space
- Garage-to-house door (often missing a proper sweep and gasketing)
Quick DIY Draft Tests
- Tissue test at door/window edges on a breezy day; flutter = leak
- Flashlight test at night with a helper outside; light bleed = gap
- Hand test after sunset; feel for cool air at trim and outlets
- Incense/smoke pencil near suspect joints; smoke drift = air movement
Step-By-Step Mini Plan
- Remove old, cracked weatherstripping; clean the surface with alcohol
- Install new compression weatherstripping sized to your gap
- Add an adjustable aluminum door sweep; set it to just kiss the threshold
- Run high-quality paintable caulk along interior trim cracks; tool it smooth
- Foam bigger penetrations with low-expansion can foam; trim flush after cure
- Gasket the attic hatch and add a rigid, insulated cover or box
Materials & Tools
- Compression weatherstripping and adjustable door sweep
- High-quality silicone/acrylic-latex caulk and caulk gun
- Low-expansion foam for larger gaps
- Utility knife, painter’s tool, and alcohol wipes for prep
- Tape measure and screwdriver for hardware adjustments
- Attic hatch gasket and insulated cover kit
Common Mistakes
- Over-foaming gaps so the door or window binds
- Using interior caulk on exterior joints or vice versa
- Skipping the attic hatch, which leaks like a “big open vent”
- Forgetting the garage-to-house door, a major comfort leak
Time & Cost
Most doors and a couple of drafty windows can be sealed in 1–2 hours with $30–$80 in materials. Adding an attic hatch gasket and cover typically runs $50–$150 in materials and pays back quickly in comfort.
When To Call a Pro
- Persistent drafts after basic weatherstripping and caulking
- Ice-cold second floor or rooms over a garage despite normal heating
- Noticeable gaps at rim joists or complex penetrations needing spray foam detail
- You want a blower-door test and thermal imaging to pinpoint leaks precisely
Local Tip: Older Terre Haute homes often have uneven thresholds. Use an adjustable sweep and, if needed, a new threshold with an integrated gasket to close daylight without making the door hard to latch.
Sealing these obvious leaks is the quickest way to winterize your house in Terre Haute without major cost.
STEP 2 of 10
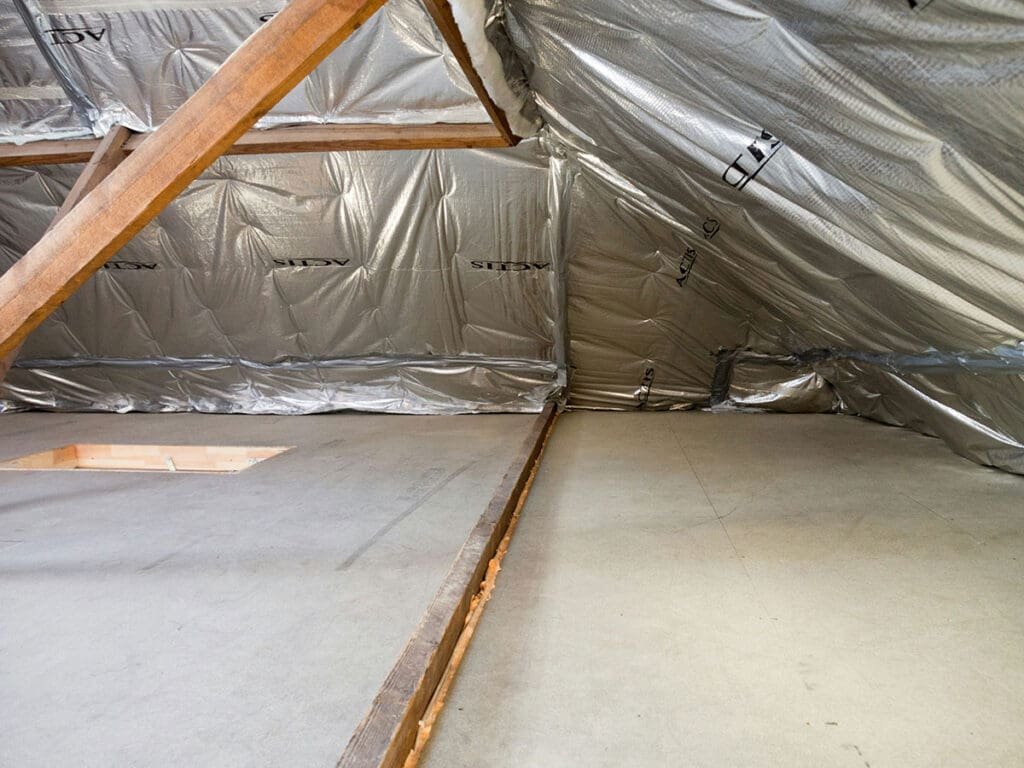
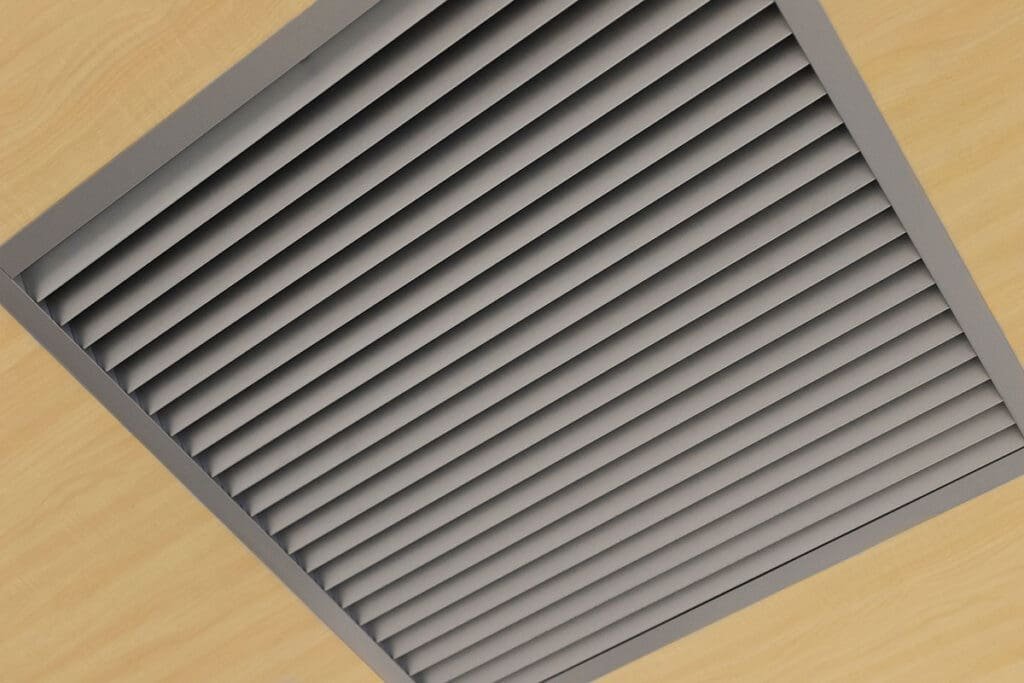
2) Air-Seal First, Then Insulate the Attic
The biggest comfort and bill savings often come from the top of the house. Seal air leaks in the attic before you add insulation so your upgrade actually performs and to winterize your house in Terre Haute against drafts, moisture, and ice dams.
Mini-Checklist (4)
- Seal light boxes and chases
- Gasket the attic hatch
- Add insulation depth
- Verify soffit and ridge airflow
What To Do
Before blowing or laying more insulation, seal all attic air pathways: around light boxes, bath fan housings, plumbing/electrical chases, and wall top plates. Gasket and insulate the attic hatch or pull-down stairs, then top up insulation. Keep soffit baffles open so intake air can move to the ridge for healthy ventilation.
Why It Matters
Warm air rises (stack effect). If it escapes into the attic, you pay twice: higher heating costs and increased ice-dam risk as roof snow melts and refreezes at the eaves. Air-sealing first lets insulation work to spec, reduces cold rooms, and helps manage attic moisture.
Where Leaks Usually Hide
- Recessed lights and fan housings (older can lights and bath fans)
- Electrical and plumbing chases that run from basement to attic
- Wall top plates where drywall meets framing
- Attic hatch or pull-down stair perimeter and lid
- Flues and chimneys (require non-combustible sealing materials)
- Duct boots where ceiling registers meet drywall
Step-By-Step Mini Plan
- Map leaks with a flashlight; look for dirty or wind-streaked insulation near gaps
- Box or cover recessed lights/fans with fire-rated covers; seal seams with approved tape/foam
- Seal top plates, wire holes, and pipe penetrations with foam or caulk as appropriate
- Wrap and collar bath fan ducts; vent them outdoors with a tight hood, not into the attic
- Install baffles at soffits to keep air channels open before adding insulation
- Add insulation to target depth; install a gasketed, insulated hatch or stair cover
Materials & Tools
- Low-expansion spray foam and high-quality sealant
- Fire-rated light/fan covers and foil or butyl tape
- Mineral wool or sheet-metal flashing + fire-rated sealant for chimney gaps
- Soffit baffles and mechanical fasteners
- Insulated attic hatch/pull-down stair cover kit with compressible gasket
- Tape measure, utility knife, respirator, gloves, headlamp, kneeboards
Common Mistakes
Adding insulation without air-sealing first (locks leaks under fluff)
Blocking soffit vents with new insulation (kills ventilation, invites ice dams)
Venting bath fans into the attic (drives moisture and frost)
Using combustible foam near flues or hot fixtures (use fire-rated methods)
Time & Cost
A focused DIY air-seal on a typical attic runs half a day to a day in prep and sealing, plus time for insulation. Materials for sealing often land in the $75–$250 range; insulation cost varies by area and type.
When To Call a Pro
- Persistent upstairs cold spots after sealing obvious leaks
- Complex cathedral ceilings, knee walls, or hard-to-reach chases
- Evidence of chronic moisture (mold, wet sheathing) or past ice-dam damage
- You want blower-door testing and thermal imaging to pinpoint hidden bypasses
Local Tip: In freeze–thaw stretches around Terre Haute, watch for nail frost or damp sheathing on cold mornings—both signal warm, moist air leaking into the attic. Prioritize sealing around fans, chases, and the hatch.
STEP 3 of 10
3) Protect Pipes from Freezing
Frozen lines burst fast and repairs get expensive. Prioritize plumbing protection to winterize your house in Terre Haute before the first hard freeze.
Mini-Checklist (4)
- Foam sleeves on exposed lines
- Drain and cover hose bibs
- Seal cold-air leaks near plumbing
- Tag and test the main shutoff
What To Do
Insulate exposed lines in garages, crawl spaces, and exterior walls. Shut off and drain outdoor hose bibs, and block nearby drafts that chill pipes. Use UL-listed heat tape only where the manufacturer specifies, and plug it into a GFCI. Find, label, and test your main water shutoff so you can react quickly.
Why It Matters
A few dollars of insulation and a labeled shutoff can prevent thousands in water damage. Draft control plus insulation stabilizes pipe temps during Wabash Valley cold snaps and overnight lows.
Step-By-Step Mini Plan
- Identify exposed or exterior-wall runs; note any nearby drafts
- Add foam sleeves (tight fit, taped seams) along all accessible lines
- Install faucet covers outside; shut off and drain bibs from interior valves
- Seal cold-air leaks (foam/caulk around vents, wire holes, and rim joists)
- Apply thermostat-controlled heat tape only where allowed; route to GFCI
- Tag the main shutoff and test it; post a printed “water off” checklist
High Risk Locations
- Garage or unheated utility rooms (especially near overhead doors)
- Crawl spaces and rim joists against exterior walls
- Kitchen/bath sinks on exterior walls (short runs through cold cavities)
- Laundry lines near vents or poorly sealed dryer ducts
- Outdoor hose bibs and sillcocks without interior shutoffs
- Any pipe near vents, gaps, or recessed lights that leak cold air
Materials & Tools
- Closed-cell foam pipe insulation (match pipe diameter)
- UL-listed heat tape with built-in thermostat (as specified)
- Exterior faucet covers and interior shutoff tags
- Low-expansion foam and quality sealant for air leaks
- Utility knife, foil or vinyl tape, zip ties
- Bright shutoff tag and a permanent marker
Common Mistakes
- Wrapping heat tape over itself or under insulation against instructions
- Leaving hose bibs pressurized (no shutoff, no drain-down)
- Insulating pipes but ignoring the cold draft next to them
- Plugging heat tape into a non-GFCI outlet
Time & Cost
Most homes can insulate key runs and seal obvious drafts in 1–3 hours. Typical materials: $25–$100 for sleeves and covers; $30–$80 per run for heat tape where needed.
When To Call a Pro
- No interior shutoff for hose bibs or a seized main shutoff
- Persistent freezes in a specific wall or crawl space despite insulation
- Evidence of past bursts, leaks, or mold in hidden cavities
- Need for rerouting lines, adding shutoffs, or upgrading sillcocks
Local Tip: For sinks on exterior walls, pull the vanity items and leave doors open during deep cold. A slow drip on the most exposed faucet can keep water moving when temps dive.
STEP 4 of 10
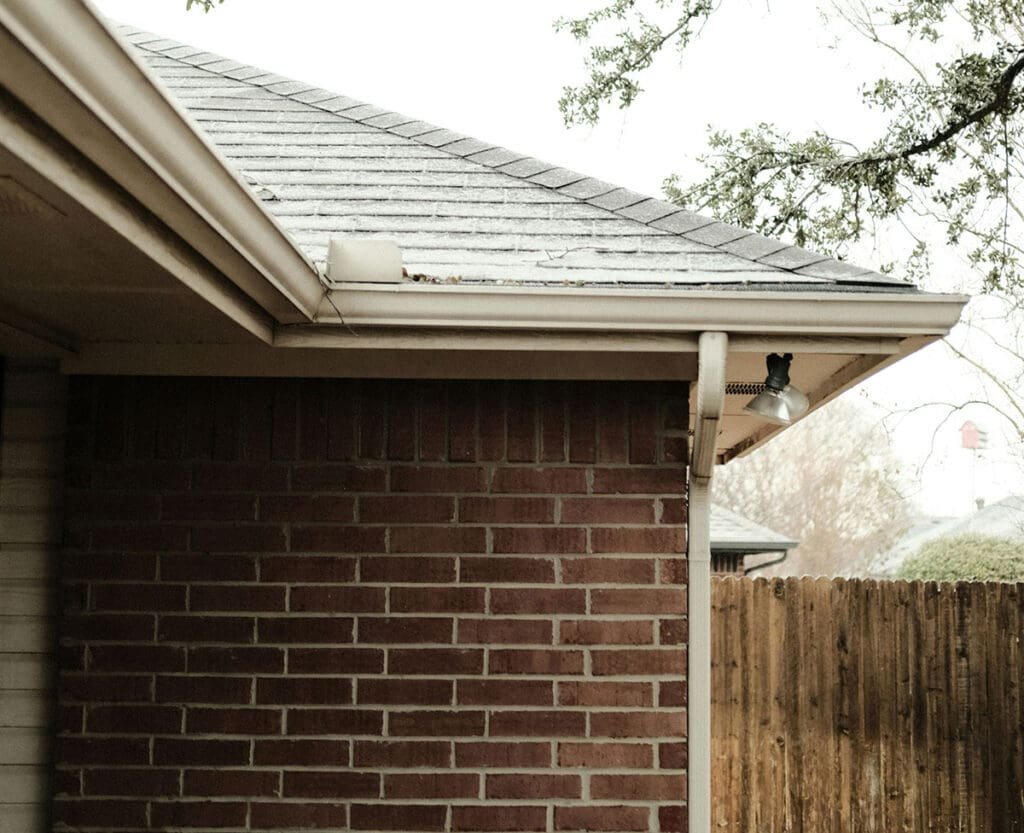
4) Control Roof Runoff and Ground Water
Drainage makes or breaks winter comfort and safety. Manage roof runoff and surface water to winterize your house in Terre Haute, cut ice risks at entries, and keep basements drier during freeze–thaw cycles.
Mini-Checklist (4)
- Gutter cleaning Terre Haute
- Downspout extensions (6–10 ft)
- Positive grade away from foundation
- Sump test and clear discharge
What To Do
Clean gutters, clear downspouts, and add extensions so discharge lands several feet from the foundation. Walk the yard to confirm positive slope away from the house and fill low spots that collect meltwater. Check that driveway and walkway edges don’t funnel water toward steps or doors.
Why It Matters
Poor drainage creates icy sidewalks and stoops, saturates soils against the foundation, and accelerates freeze pressure. Fixing runoff reduces ice hazards, moisture in basements, and the chance of frost-related movement around footings.
Where Problems Normally Start
- Gutters packed with leaves near valleys and over porches
- Downspouts that dump at the base of the wall with no extensions
- Settled backfill along foundations that now slopes toward the house
- Short splash blocks that splash water onto walks and stairs
- Downhill lots where neighbor runoff crosses your yard
- Sump discharge lines that freeze or dump too close to the house
Step-By-Step Mini Plan
- Flush gutters and downspouts; verify each downspout runs free to grade
- Add 6–10 ft downspout extensions (flex or solid) to move water away
- Regrade low spots with compacted soil so surface water flows off the house
- Redirect walkway and patio edges so they don’t channel water to entries
- Test the sump pump: lift the float, confirm discharge is clear and daylighted
- Mark winter plow paths so extensions and discharge lines aren’t crushed
Materials & Tools
- Gutter scoop, hose with nozzle, and a safe ladder setup
- Downspout elbows and 6–10 ft extensions (flexible or corrugated)
- Heavy-duty splash blocks or diverters
- Topsoil for spot regrading and a tamper for compaction
- Sump check valve (if needed) and heat cable for exposed discharge sections
- Work gloves, eye protection, and a helper for ladder safety
Common Mistakes
- Pointing extensions across sidewalks where they refreeze into ice sheets
- Letting insulation block soffit inlets while cleaning gutters (kills ventilation)
- Ending sump discharge right at the foundation or into a window well
- Using short splash blocks instead of true extensions on problem corners
Time & Cost
Most homes can handle gutter cleaning and extensions in 1–3 hours. Expect roughly $20–$60 per downspout for extensions and elbows; spot regrading varies by area size but often starts under a couple hundred dollars for DIY soil and tamping.
When To Call a Pro
- Chronic damp basement walls or a history of seepage
- Settled slabs or grading challenges that need equipment
- Sump lines that freeze or backflow in severe cold
- Need for French drains, yard swales, or hardscape rework
Local Tip: In Terre Haute’s freeze–thaw pattern, long downspout extensions (8–10 ft) make a visible difference. If you repeatedly get ice at a stoop, move the discharge behind landscaping beds and add a shallow swale to guide meltwater away.
STEP 5 of 10
5) Service HVAC and Dial in the Thermostat
Your heating system does the heavy lifting all winter. A short tune-up and smarter scheduling boost comfort, cut bills, and help winterize your house in Terre Haute before the first hard freeze.
Mini-Checklist (4)
- Furnace tune-up
- Fresh filter
- CO/smoke test
- Thermostat schedule
What To Do
Schedule a fall HVAC tune-up, replace filters, and set a moderate thermostat program (wake/away/evening/sleep). Test carbon-monoxide alarms and replace units older than seven years. Clear returns and supply registers, and make sure nothing blocks airflow within 18–24 inches.
Why It Matters
Preventive maintenance beats a mid-January breakdown. Clean burners and coils improve efficiency, fresh filters protect equipment, and proper airflow prevents hot-cold swings that make rooms feel drafty.
Where HVAC Normally Falls Short
- Clogged or high-MERV filters that choke airflow
- Dirty flame sensor or heat exchanger reducing safe operation
- Blocked return grills behind furniture or rugs
- Leaky or uninsulated ducts in attics/crawl spaces
- Misprogrammed thermostats fighting your schedule
- Condensate drains on high-efficiency furnaces partially blocked
Step-By-Step Mini Plan
- Book a tune-up: combustion check, flame sensor clean, heat-exchanger inspection, blower and inducer check
- Replace the filter (right size/MERV); set a reminder cadence (30–90 days)
- Vacuum return grills and confirm all supply registers are open and unobstructed
- Verify condensate drain is clear; add tablets if recommended to reduce slime buildup
- Program the thermostat: modest setbacks (e.g., 2–4°F) for wake/away/evening/sleep
- Walk the house: note rooms over the garage or far runs; balance registers slightly to even temps
Materials & Tools
- Correct-size furnace filter (appropriate MERV for your system)
- Thermostat batteries (if applicable)
- Small level and screwdriver for thermostat mounting/terminals
- Wet/dry vacuum for returns and condensate cleaning
- Condensate tablets (as recommended)
- Phone reminder or calendar for filter/tune-up cadence
Common Mistakes
- Using an ultra-high MERV filter your blower can’t handle (starves airflow)
- Closing supply registers to “push heat elsewhere” (raises static pressure, wastes energy)
- Over-aggressive setbacks that never recover on cold days
- Skipping CO alarm replacement after 7 years (sensors age out)
Time & Cost
A pro tune-up typically takes under an hour; local pricing varies but is far cheaper than an emergency call. Filters run a few to a few dozen dollars each depending on size/MERV; most homes spend <$100 to get winter-ready.
When To Call a Pro
- Frequent short-cycling, odd smells, or visible burner roll-out
- Uneven heating that persists after basic airflow checks
- Old thermostat with unreliable scheduling or dead display
- Suspected duct leaks in attic/crawl that need sealing or insulation
Local Tip: Rooms over garages run cold around Terre Haute. Weatherstrip the garage door, seal the garage ceiling penetrations, and keep the garage-to-house door gasketed; small fixes there noticeably stabilize upstairs temperatures.
STEP 6 of 10
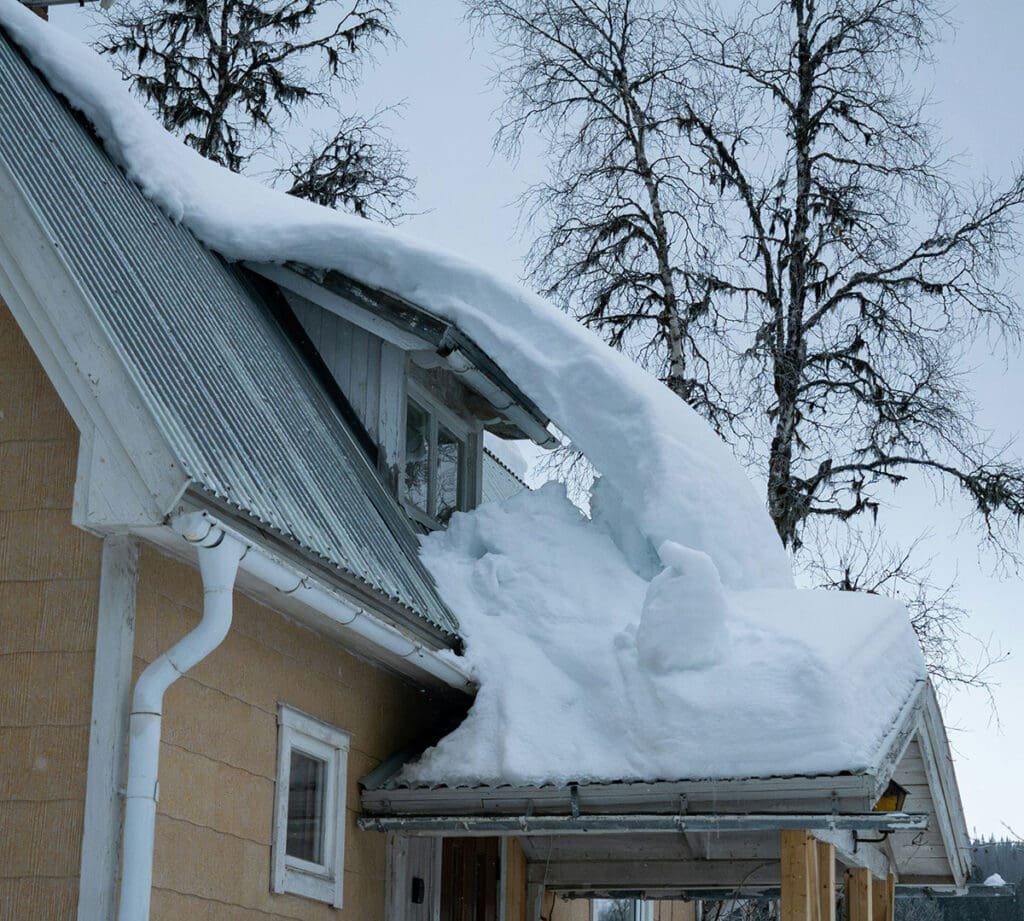
6) Prevent Ice Dams Before They Form
Ice dams happen when warm indoor air sneaks into the attic, melts roof snow, and that melt refreezes at the eaves. Break the cycle to winterize your house in Terre Haute and protect soffits, ceilings, and insulation.
Mini-Checklist (4)
- Seal attic bypasses
- Add insulation depth
- Keep ventilation paths clear
- Roof-rake after storms
What To Do
Stop warm air from reaching the roof deck with thorough attic air-sealing, then add insulation to the correct depth. Keep soffit and ridge ventilation paths open. After heavy snows, use a roof rake from the ground to clear the first 3–5 feet above the eaves.
Why It Matters
Ice dams trap meltwater behind a ridge of ice. That water backs up under shingles, wets sheathing and insulation, and can stain ceilings or spawn mold. Air-sealing plus insulation tackles the root cause; raking is a safe seasonal assist.
Where Ice Dams Start
- Above bathrooms and kitchens with leaky fan ducts or warm chases
- Along cathedral ceilings and knee walls with thin or interrupted insulation
- At unsealed attic hatches and pull-down stairs
- Around recessed lights and can fixtures that leak heat
- Over additions where framing transitions create voids
- Near chimneys and flues with gaps that weren’t sealed using fire-safe methods
Step-By-Step Mini Plan
- Scan the attic on a cold morning for nail frost or damp sheathing (telltale leaks)
- Seal penetrations (light boxes, top plates, wiring/pipe chases) with foam/caulk
- Gasket and insulate the attic hatch or stair cover; weatherstrip the trim
- Correct bath fan ducting: smooth, insulated run to an exterior hood (not into the attic)
- Add insulation to target depth; install soffit baffles to maintain airflow
- After storms, roof-rake the lower roof from the ground to relieve the eaves
Materials & Tools
- Low-expansion spray foam and high-quality sealant
- Soffit baffles and mechanical fasteners
- Insulated attic hatch/pull-down stair cover with compressible gasket
- Insulated, smooth bath-fan duct and exterior vent hood with damper
- Blown-in or batt insulation to reach target R-value
- Lightweight roof rake with extension handle (ground use only)
Common Mistakes
- Adding insulation without air-sealing first (leaks remain under the fluff)
- Blocking soffit inlets with new insulation (kills ventilation, worsens ice dams)
- Venting bath fans into the attic or soffit cavity (loads moisture and heat)
- Using heat cables as a “fix” instead of addressing attic bypasses
Time & Cost
Air-sealing targeted penetrations often takes a few hours and $75–$250 in materials. Insulation cost varies by area and type. A roof rake is a modest one-time buy and pays off during big snow events.
When To Call a Pro
- Repeated ceiling stains or history of winter leaks
- Complex rooflines, cathedral ceilings, or inaccessible knee walls
- Persistent attic frost or visible mold on sheathing
- Need for blower-door testing and thermal imaging to find hidden bypasses
Local Tip: In Terre Haute’s freeze–thaw swings, the worst dams appear over bathrooms and along knee walls. Prioritize sealing those chases, then verify that soffit baffles keep a clear channel to the ridge vent.
STEP 7 of 10
7) Make Entries Safer
Winter slips happen fast. Upgrade lighting, traction, and rail stability to winterize your house in Terre Haute for everyday comings and goings.

Mini-Checklist (4)
- Non-slip mats placed inside and out
- Rail hardware tightened/re-anchored
- Bright, outdoor-rated bulbs installed
- De-icer and shovel staged at the main door
What To Do
Add non-slip mats at every door, tighten wobbly railings, and replace dim or burnt bulbs at exterior fixtures. Stage de-icer and a shovel where you’ll actually grab them—garage door, mudroom, or porch box—so clearing ice is automatic.
Why It Matters
Falls on icy steps and poorly lit paths are the most common winter injuries. Small fixes here cut ER visits, protect guests, and make mail/package runs safer during freeze–thaw swings.
Where Issues Usually Show Up
- Porch and stoop landings with smooth concrete or composite decking
- First and last stair treads (where footing changes)
- Handrail posts and brackets that loosen over time
- Side doors used for trash cans or pets (often poorly lit)
- Walkway dips that collect meltwater and refreeze at night
- Garages where wet cars drip onto sloped, slick floors
Step-By-Step Mini Plan
- Swap bulbs for brighter, outdoor-rated LEDs; add a motion sensor at side/rear doors
- Place heavy, non-slip mats inside and outside each entry; add stair tread strips where needed
- Tighten rail brackets and lag new anchors into solid framing if any wobble remains
- Keep a bucket of de-icer and a shovel right at the high-use door; treat thin glaze early
- Broom off powder snow promptly so it doesn’t compact into ice on stoops and steps
- Squeegee garage meltwater toward a drain or outside to reduce overnight slick spots
Materials & Tools
- Outdoor-rated LED bulbs (bright, 3000–4000K), motion sensor or dusk-to-dawn adapters
- Heavy, beveled-edge entry mats and stair tread grip strips
- Exterior-grade screws/lag bolts and a driver for rail hardware
- Calcium or magnesium chloride de-icer (concrete-friendly; pet-safe formulas available)
- Sturdy snow shovel and a floor squeegee for garages
- Small storage bin or hook near the door for “grab-and-go” tools
Common Mistakes
- Using slick decorative mats without rubber backing
- Treating with rock salt that pits concrete and harms nearby plants/pets
- Ignoring a wobbly rail—it worsens and fails when you need it most
- Relying on a single dim fixture when a motion-activated light would cover the approach
Time & Cost
Most entry upgrades take 30–90 minutes per door. Expect roughly $15–$30 per bulb, $20–$50 per mat, $10–$25 for tread strips, and $15–$30 for a bag of de-icer.
When To Call a Pro
- Loose rails/posts that need new blocking or code-compliant anchoring
- Cracked or heaved steps/stoops that hold water and refreeze
- Electrical issues (no power at exterior fixtures, failing motion sensors)
- Drainage problems funneling water toward entries
Local Tip: South-facing stoops in Terre Haute thaw by day and refreeze at dusk. Keep those surfaces brushed clean, lit, and lightly treated with de-icer during freeze–thaw stretches.
STEP 8 of 10
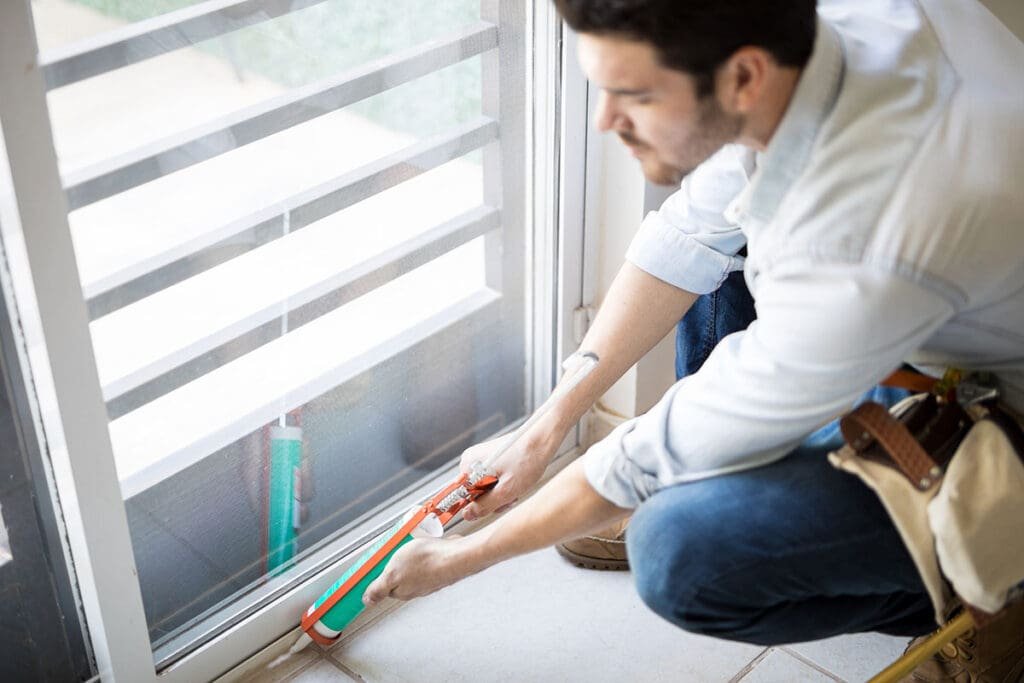
8) Fix the Worst Window and Door Offenders
Drafts are the fastest way heat escapes in older Wabash Valley homes. Start here to winterize your house in Terre Haute efficiently, cut energy waste, and make rooms feel warmer without cranking the thermostat.
Mini-Checklist (4)
- Interior trim caulk refresh
- Door sweep tune-up
- Film kit on the coldest window
- Garage door bottom seal and side jamb gaskets
What To Do
Start with the worst offenders. Re-caulk interior trim where paint or sealant has cracked, add a clear film kit to the coldest window for a seasonal tighten, and refresh door sweeps and weatherstripping. If you feel a steady cold flow at the garage threshold, tune the bottom seal and side jamb gaskets so they actually touch the floor and stops.
Why It Matters
A handful of strategic upgrades often outperforms an expensive whole-house window project in the short term. Tightening the worst leaks reduces drafts, stabilizes room temps, and sets you up for smarter long-term replacements later.
Where Drafts Normally Start
- Interior trim joints at older windows where caulk has hairline cracks
- Meeting rails and lock points on double-hung sashes
- Door bottoms where worn sweeps no longer meet the threshold
- French/slider doors at the interlock and fixed-panel edge
- Garage overhead door bottom seal and side jamb weatherstrips
- Pet doors or mail slots with loose flaps and gaps
Step-By-Step Mini Plan
- Do a quick tissue or incense test around suspect frames and meeting rails
- Cut out failed caulk; run a clean bead of paintable acrylic-latex along interior trim and tool it smooth
- Install a clear window film kit on the single worst window; shrink tight with a hair dryer
- Replace door sweeps; adjust thresholds so the sweep just kisses the sill without dragging
- Add or replace compression weatherstripping at the latch side and head jamb
- For garage doors, swap the bottom bulb seal and tune side/top weatherstrips to close daylight
Materials & Tools
- Paintable acrylic-latex caulk and a caulk gun
- Clear window film kit with double-sided tape
- Adjustable door sweep and replacement threshold screws
- Compression weatherstripping (adhesive or kerf-insert)
- Garage door bottom bulb seal and side/top vinyl weatherstrips
- Utility knife, painter’s tool, tape measure, hair dryer, screwdriver/driver
Common Mistakes
- Caulking over dirty, glossy trim without scuffing or cleaning first
- Setting door sweeps too low so they drag and wear out quickly
- Ignoring the latch-side gap; only sealing the hinge side does little
- Skipping the garage because it’s “unconditioned” (it still chills adjacent rooms)
Time & Cost
Most door sweep and weatherstrip refreshes take 20–40 minutes per door. A film kit on a problem window is typically under an hour. Expect $10–$30 for caulk and tools, $15–$35 per sweep, $12–$25 for a film kit, and $20–$50 for a garage bottom seal.
When To Call a Pro
- Persistent condensation or mold around frames hinting at hidden moisture issues
- Rot at sills or jambs that needs carpentry repair
- Sagging doors that won’t align even after hinge and threshold adjustments
- Multiple failed IGUs (fogged double-panes) requiring sash or unit replacement
Local Tip: Pair a trim re-caulk with any sash or storm insert upgrade for the biggest comfort jump in older Terre Haute homes. Tight interior seals plus a seasonal film on the coldest window can feel like a new unit for one winter.
STEP 9 of 10
9) Prep the Garage and Outbuildings
Unheated spaces can siphon heat and endanger plumbing. Tighten these areas to winterize your house in Terre Haute beyond the main living rooms.
Mini-Checklist (4)
- Overhead door seals tight (new bulb + tuned side/top seals)
- Service door sweep and weatherstrip installed
- Exposed lines insulated; drafts sealed
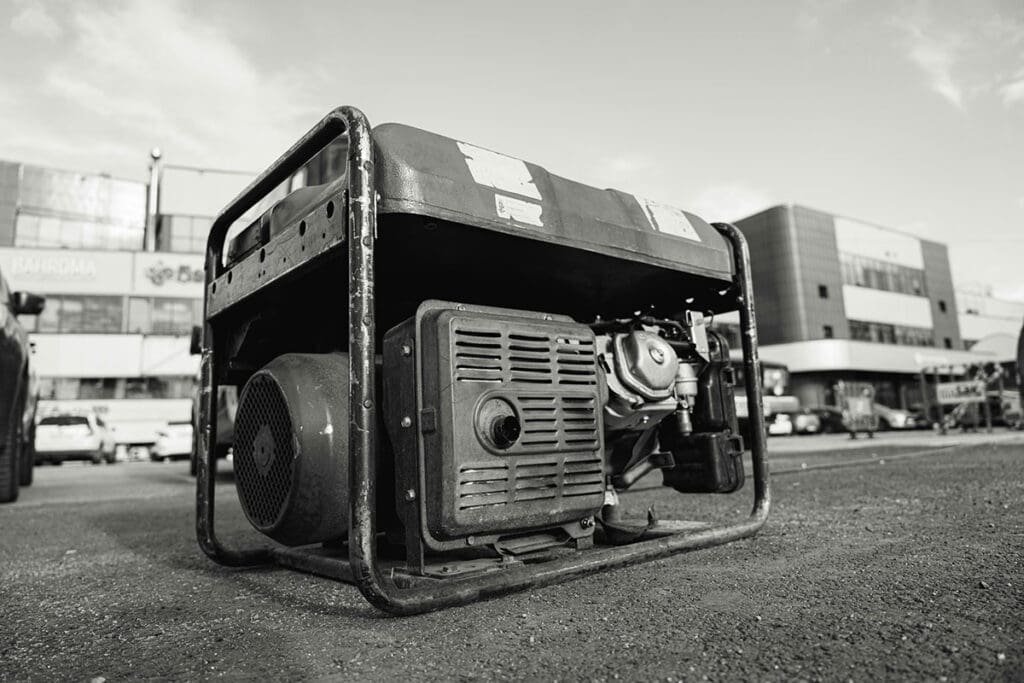
- Generator safety and outdoor setup confirmed
What To Do
Weatherstrip overhead and service doors, replace worn bottom seals, and insulate vulnerable water lines in bays and utility corners. Relocate paints/finishes that can’t freeze, and review safe, outdoor-only generator use. Stage extension cords and fuel (if applicable) before storms so you’re not scrambling.
Why It Matters
Cold garages bleed heat into adjacent rooms and chill bedrooms over the garage. Drafts plus exposed pipes create freeze risk; standing meltwater drives humidity, rust, and slippery floors.
Where Issues Usually Show Up
- Overhead door bottom bulb that no longer touches the slab
- Side/top door jamb weatherstrips with gaps or hardened vinyl
- Service door missing a sweep or with a warped threshold
- Exposed plumbing along exterior walls or near vented areas
- Sheds/outbuildings with hose bibs or shallow lines
- Generator storage areas without clear, outdoor operating space
Step-By-Step Mini Plan
- Seal the overhead door: swap the bottom bulb (T- or circular type to match track) and adjust tracks so side/top weatherstrips just kiss the door
- Fix the service door: install a compression weatherstrip set and an adjustable sweep; level the threshold for a tight seal
- Insulate plumbing runs: add foam sleeves, tape seams, and seal nearby wall/floor gaps that blow cold air onto pipes
- Manage meltwater: squeegee snowmelt toward a drain or outside; keep floor dry to cut overnight ice and humidity
- Protect valuables/chemicals: move paints/finishes and adhesives to a temperature-safe spot; protect batteries from freezing
- Generator safety check: confirm outdoor operating location (never in garage), test cords, and identify a GFCI-protected outlet path
Materials & Tools
- Overhead door bottom bulb seal and side/top weatherstrip (vinyl/brush)
- Compression weatherstripping kit and adjustable door sweep for service door
- Closed-cell foam pipe insulation (match pipe diameter) and foil/vinyl tape
- Low-expansion foam/caulk for rim-joist and utility penetrations
- Floor squeegee, absorbent mats, and a bucket for meltwater control
- Outdoor-rated extension cords, GFCI outlets, and generator owner’s manual
Common Mistakes
- Replacing the bulb seal with the wrong T-width or profile (leaves daylight)
- Setting the sweep too low so it drags and tears quickly
- Insulating pipes but ignoring the cold draft blowing on them
- Running a generator in the garage with the door cracked (CO hazard—never do this)
Time & Cost
Most garages can be sealed in 1–3 hours. Expect ~$20–$50 for a bottom bulb seal, $20–$40 for side/top weatherstrips, $15–$35 for a quality sweep, and $25–$75 for pipe sleeves and sealants. Outbuilding hose bib covers cost only a few dollars each.
When To Call a Pro
- Overhead door won’t align or seal after track/roller adjustments
- Repeated pipe freezes in a specific bay or rim-joist area
- Need to add shutoffs, reroute lines, or insulate hard-to-reach runs
- Electrical upgrades for generator interlocks, transfer switches, or exterior outlets
Local Tip: If you park wet cars inside around Terre Haute, a 5–10 minute evening squeegee routine keeps floors dry and humidity down. Add a small fan near the floor drain to speed evaporation during deep cold.
STEP 10 of 10
10) Build a Readiness Kit and Document Systems
Storm hiccups and deep freezes are easier when essentials are staged and info is at your fingertips. A small kit plus clear documentation helps winterize your house in Terre Haute for a resilient season.
Mini-Checklist (4)
- Filters and batteries stocked
- Flashlights, blankets, first-aid staged
- Printed contacts + shutoff instructions posted
- Equipment label photos saved and printed
What To Do
Stock spare filters, batteries, flashlights, blankets, and a compact first-aid kit. Photograph equipment labels (furnace, water heater, electrical panel) and keep a printed contact sheet for utilities and trusted contractors. Note where the main water, gas, and breaker shutoffs are—label them so anyone in the house can act fast.
Why It Matters
During outages or sudden cold snaps, you don’t want to hunt for tools or numbers. A ready kit shortens downtime, avoids damage (like frozen pipes), and makes service calls faster because model/serial info and shutoff locations are already documented.
What To Include
- Furnace filters (the correct size) and CO/smoke detector batteries
- Two flashlights + extra batteries, plus a small lantern for hands-free light
- Warm blankets and basic first-aid supplies
- De-icer and an entryway shovel or scoop
- Phone chargers (including a car charger)
- Printed contacts: utility emergency numbers, plumber/GC, electrician, HVAC
- A laminated “How to shut off water/gas/power” card with simple steps
- Zip bag with photos of equipment labels and your breaker panel map
Step-By-Step Mini Plan
- Make a one-page contacts + shutoffs sheet; print two copies (kitchen + utility room)
- Photograph labels on the furnace, water heater, and major appliances; save to cloud + print
- Replace detector batteries; test CO/smoke alarms and note dates on the devices
- Stage flashlights at two locations (bedroom + main living area) and one small lantern
- Put de-icer, shovel, and mats by the door you actually use in winter
- Add a calendar reminder to rotate filters/batteries every 90 days
Materials & Tools
- Correct-size furnace filters and AA/9V batteries
- Two LED flashlights and a small LED lantern
- De-icer (concrete-friendly) and a compact shovel
- Zip bag or folder for printed docs and photos
- Permanent marker and bright shutoff tags
- Phone car charger and/or small battery bank
Common Mistakes
- Stashing the kit in a hard-to-reach closet (put it where you’ll grab it)
- Only storing numbers digitally—print them in case phones die
- Skipping CO/smoke tests after battery swaps
- Forgetting to label the main water shutoff and breaker that kills the furnace
Time & Cost
Most families can assemble a solid kit in under an hour for $40–$120 using items you already own plus a few additions (filters, batteries, de-icer, extra flashlight).
When To Call a Pro
- You can’t find or operate the main shutoffs safely
- CO/smoke detectors won’t test properly or wiring looks suspicious
- Breaker panel labeling is wrong or incomplete
- You want a whole-home generator, transfer switch, or sump backup installed
Local Tip: Plug a cheap nightlight into a GFCI near the utility area. If it’s dark, the GFCI tripped—handy during Terre Haute’s freeze–thaw swings and quick power blips.
Costs and Timing in Terre Haute, Indiana
Getting winter-ready doesn’t have to be expensive. Most high-impact fixes cost little and pay off in comfort and fewer emergencies. Aim to winterize your house in Terre Haute, Indiana before the first prolonged freeze.
Typical Costs (Local-Friendly Ranges)
| Item | DIY Materials (Approx.) | Notes |
|---|---|---|
| Weatherstripping + door sweep (per door) | $20–$40 | Biggest quick win for drafts |
| Caulk + low-expansion foam (per room/zone) | $10–$35 | Seal trim gaps and penetrations |
| Pipe insulation (per linear foot) | $1–$4 | Match sleeve size to pipe diameter |
| Exterior faucet covers (each) | $5–$12 | Use with interior shutoff + drain-down |
| Downspout extensions (6–10 ft) | $10–$30 | Move meltwater several feet away |
| Gutter cleanout (DIY) | $0–$20 | Hose/scoop/gloves; pro service varies |
| Roof rake (one-time) | $40–$90 | Ground use for post-storm clearing |
| Furnace filter (each) | $8–$30 | Size/MERV dependent |
| CO/smoke batteries (set) | $6–$20 | Replace and test annually |
| Attic hatch gasket/cover kit | $50–$150 | Stops a major heat leak |
| Attic insulation top-up* | Varies by area/type | Quote after air-sealing (*largest variable) |
Tip: Do air-sealing first; it makes attic insulation and HVAC work better and can reduce ice-dam risk.
Timing: When To Tackle Each Item
Late September – Early October (comfort first)
- Weatherstrip doors and add door sweeps
- Caulk/foam obvious leaks and gasket the attic hatch
- Replace furnace filter; schedule the HVAC tune-up
- Drain/cover hose bibs; insulate exposed pipes
Mid–Late October (water management + safety)
- Clean gutters and add downspout extensions
- Confirm positive grading; fill low spots that collect meltwater
- Test CO/smoke alarms (replace >7 years old)
- Stage non-slip mats, brighter bulbs, de-icer, and shovel
Early November (ice-dam prevention + final checks)
- Air-seal attic penetrations; install soffit baffles
- Add attic insulation to target depth (after sealing)
- Buy/assemble a roof rake and a simple readiness kit
- Label main water/gas/power shutoffs; print contacts sheet
If You’re Starting Late (After a Freeze)
- Prioritize pipe protection (insulate, seal drafts, open cabinets on exterior walls, slow drip on vulnerable faucets).
- Do door weatherstripping/sweeps and a fast filter change—same day comfort boost.
- Use the roof rake after each storm to reduce ice-dam pressure until attic sealing/insulation can be scheduled.
Lead Times to Keep in Mind
- HVAC tune-ups book fast in cold snaps—call early
- Attic insulation crews need air-sealing done first
- Exterior electrical or drainage fixes may require dry weather
- Special-order thresholds, seals, or hatch covers can take a week+
Mini-Checklist
- Knock out drafts and pipe protection first
- Handle gutters, downspouts, and grading before repeat freezes
- Tune HVAC and test CO/smoke alarms
- Schedule attic sealing/insulation next available window
DIY vs Pro: Where Patriot Property Pros Fits
Some winter prep is perfect for a confident DIYer; other fixes pay off faster (and safer) with a pro. Here’s how to decide—and how we can help you winterize your house in Terre Haute without guesswork.
What Homeowners Can DIY
- Weatherstripping and door sweep installs
- Caulking small interior trim gaps; low-expansion foam on simple penetrations
- Pipe insulation and exterior faucet covers
- Gutter clean-outs and adding 6–10 ft downspout extensions
- Entry upgrades: brighter bulbs, non-slip mats, basic rail screw tightening
- Roof-raking the first few feet above eaves after storms
When To Call a Pro
- Persistent drafts or cold rooms after basic sealing
- Uneven heating between floors, suspected duct or airflow issues
- Attic or roof concerns (bath fans venting into the attic, blocked soffits, moisture)
- History of ice dams, ceiling stains, or attic frost/mold
- Electrical needs (new exterior circuits, heat cable placement, CO/smoke wiring)
- Drainage or grading problems that require tools, hauling, or concrete work
How Patriot Property Pros Helps
- Attic air-sealing and prep, soffit baffles, and hatch/stair cover installs
- Bathroom ventilation: new bath fans and ducting vented outdoors (not into the attic)
- Minor exterior carpentry: thresholds, rails, steps, and weather-exposed trim
- Garage/outbuilding weatherization: overhead/service door seals, pipe protection
- Pipe-freeze prevention: shutoffs, reroutes, and insulation in vulnerable bays
- Runoff fixes: longer downspouts, splash blocks, and small regrading projects
What To Expect On a Walkthrough
- 30–45 minute inspection of doors, attic access, plumbing risks, and drainage
- A prioritized punch list with quick wins vs. higher-impact projects
- Rough budget ranges and timing (what to do now vs. next window)
- Scheduling and photo documentation so you can reference every change
Mini-Checklist
- Tackle easy DIY wins this week (doors, filters, faucet covers)
- Book your furnace tune-up if not done
- Schedule a Patriot Property Pros walkthrough for attic/roof/drainage issues
- Gather photos of trouble spots (drafts, stains, ice patterns) before the visit
Ready for a prioritized plan? We’ll help you winterize your house in Terre Haute with targeted air sealing, bath fan installs, minor exterior carpentry, and winter-ready repairs—on budget and on time.
Ready to Winterize Your House in Terre Haute?
Get a prioritized Winterization Walkthrough—seal drafts, prevent frozen pipes, and fix drainage before the first hard freeze.
Serving Terre Haute, Clinton, Rockville, and surrounding areas.