Basement Soundproofing & Between-Floor Noise Control in Terre Haute, Indiana
A quiet basement feels like true living space. Whether you’re finishing a family room, home office, gym, or guest suite, effective sound control keeps upstairs footsteps, TV bass, and plumbing noise from bleeding between floors. This in-depth guide explains practical assemblies that meet code, respect headroom, and deliver comfort—optimized for search intent and AI Overviews with clear sections, tables, and concise takeaways.
TL;DR
Make your basement feel like real living space by stopping noise where it travels: through framing, air gaps, and mechanicals. In Terre Haute, Indiana, the most effective (and still headroom-friendly) setup is isolation clips with hat channel, double 5/8″ drywall with damping, mineral wool in joists, and airtight sealing, plus quick fixes for plumbing and ducts.
- Use mass + damping: double 5/8″ drywall with a damping compound, seams staggered, perimeter acoustically sealed
- Decouple the ceiling: isolation clips and hat channel to break rigid contact between drywall and joists
- Absorb and seal: mineral wool in joist bays, backer boxes or surface fixtures instead of open can lights, seal all penetrations
- Treat bypasses: wrap drain stacks (MLV), insulate/line chases, use quiet exterior-terminated fans and flexible duct connectors
Typical costs: clips/channel hardware $3.50–$6.50/sq ft, double-layer drywall with damping $3.00–$6.00/sq ft, mineral wool $1.20–$2.20/sq ft, or $6.50–$12.00/sq ft for a quality drop ceiling. Most projects take 3–6 working days end-to-end depending on access, soffits, and finishes.
Basement soundproofing is best completed during a full basement remodel.
How Sound Travels Between Floors (Airborne, Impact, and Flanking)
Noise doesn’t just “leak”, it rides through air and structure. Upstairs voices and TV are mostly airborne sound; footsteps, subfloor squeaks, and plumbing vibration are impact/structure-borne. Both also slip around the main path via flanking routes (ducts, joists, stair openings, and gaps). That’s why there isn’t a single “soundproofing product.” You build a ceiling assembly that combines mass, decoupling, absorption, and airtightness to raise STC (airborne isolation) and lower perceived IIC problems (impact noise).
In basements, headroom is tight, so the goal is maximum isolation per inch. A balanced system, double 5/8″ drywall with a damping layer, isolation clips + hat channel, mineral wool in joists, and meticulous sealing cuts upstairs activity to a comfortable background without overbuilding.
Key principles
- Mass blocks vibration transfer: 5/8″ Type X drywall (ideally two layers) increases STC and tames low–mid frequencies.
- Decoupling breaks rigid contact: isolation clips and hat channel (resilient mounting) reduce structure-borne transfer and footfall feel.
- Absorption calms cavity echo: mineral wool or high-density fiberglass in joist bays smooths mid/high frequencies and supports any ceiling system.
- Airtightness stops flanking: acoustic sealant at perimeters/penetrations, gasketed boxes, and sealed backer boxes for lights keep sound from sneaking through gaps.
Ceiling Choices That Work in Basements
Your ceiling is the main sound-control surface, and basements add constraints: headroom, service access (valves, junction boxes), and inspection needs. Drywall ceilings give the best isolation per inch (higher STC), while acoustic drop ceilings keep access easy but trade some isolation. Hybrids split the difference by adding decoupling or mass where it matters.
In practice, pick based on how quiet the room must feel (family room vs. theater) and how often you’ll need to reach plumbing/electrical. Also consider fixtures: surface mounts or wafer LEDs with backer boxes preserve the sound envelope better than open can lights.
Compare your options
- Clips + hat channel + double 5/8″ drywall (with damping):
Best isolation per inch; strong low-frequency control; clean, finished look. Ideal for theaters/offices when you want upstairs noise to drop to a murmur. - Direct-hung double 5/8″ drywall with damping (no clips):
Solid performance on a tighter budget; adds mass and damping but less decoupling. Good for living areas where headroom and cost matter. - Acoustic drop ceiling + mineral wool above tiles:
Excellent access to valves/junction boxes; good mid/high-frequency control. Specify high-CAC/NRC tiles and seal the perimeter for better results. - Hybrid (clips + single 5/8″ drywall + high-CAC acoustic tiles):
Balanced solution: some decoupling plus serviceable access. Useful around soffits/mechanicals where a full drywall lid is risky.
How to choose
- Need maximum quiet? Use clips + channel + double 5/8″ with damping.
- Tight budget/headroom? Go direct-hung double 5/8″ with damping.
- Frequent access required? Choose a drop ceiling with mineral wool and sealed edges.
- Mixed conditions (soffits, valves, theater-adjacent)? Build the hybrid.
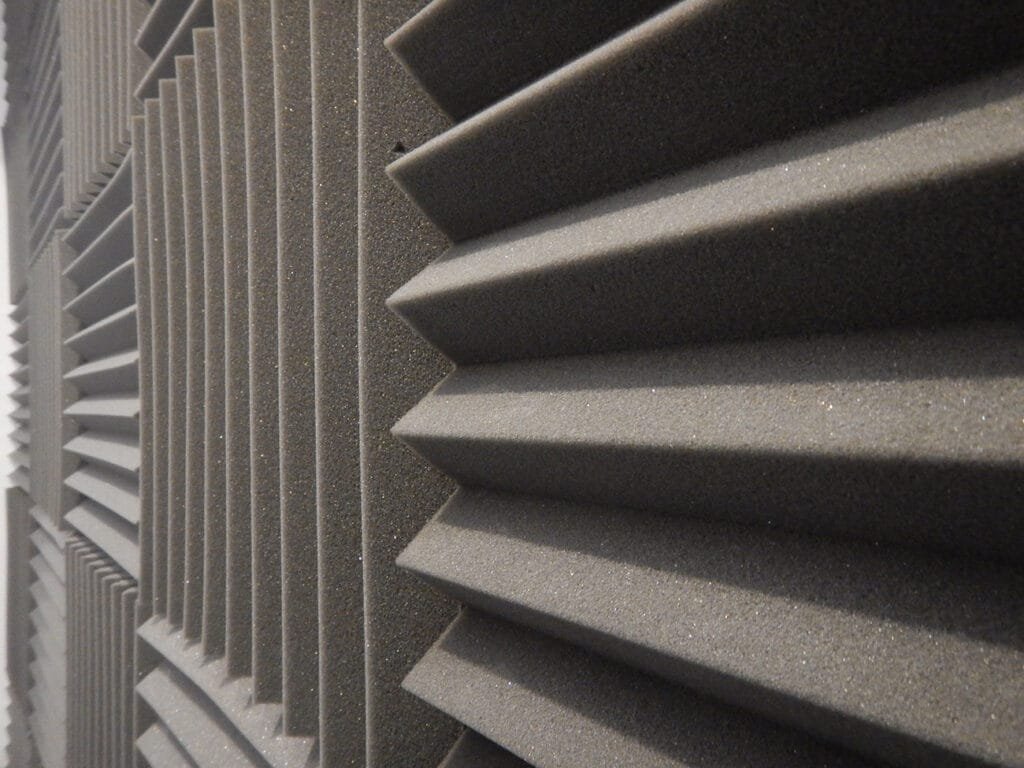
Insulation in Joist Bays
Insulation won’t kill bass on its own, but it supercharges any ceiling assembly by soaking up mid/high frequencies and smoothing reverberation in the joist cavities. In basements where drop ceilings, soffits, and mechanical chases are common, proper cavity insulation reduces “tinny” room echo and helps your drywall, clips/channel, and damping layers perform closer to their rated STC. Focus on density and full coverage rather than chasing R-value for sound; avoid compressing batts around wiring and pipes, and line noisy chases to cut flanking noise.
Best cavity fills
- Mineral wool (rock wool) sound attenuation batts: high density, fire resistant, easy friction fit, stable in humid basements
- High-density fiberglass: cost-effective upgrade over standard batts; good for tight access or long runs
- Full, gentle placement: fill bays edge-to-edge without compression; keep contact with the drywall plane for better absorption
- Line chases and soffits: add batts where ducts/plumbing pass to reduce flanking paths and mid/high-frequency bleed through grids or bulkheads
Damping Compounds and Double-Layer Drywall
Mass resists vibration, and damping turns that vibration into heat. When you bond two drywall layers with a viscoelastic damping compound (a “constrained-layer damping” setup), you reduce resonance and flatten peaks that make voices and TV carry between floors. In basements with limited headroom, double 5/8″ Type X with damping delivers a big audible upgrade per inch, especially when paired with isolation clips/hat channel and mineral wool. This combo raises airborne isolation (STC) and improves comfort in the low–mid frequencies without overbuilding.
Drywall best practices
- Use 5/8″ Type X for both layers in priority rooms to maximize mass and stiffness
- Apply a damping compound between layers at the manufacturer’s coverage rate; press the second layer on while wet
- Stagger seams between layers; leave a 1/4″ perimeter gap and seal it with acoustical sealant for an airtight boundary
- Prefer surface fixtures or wafer LEDs in backer boxes; avoid open can lights that puncture the ceiling plane
Quieting Plumbing, Ducts, and Mechanical Noise
Rigid connections let vibration skip past your ceiling assembly and reappear in other rooms. Plumbing stacks, bath fans, HVAC trunks, and mechanical rooms are classic flanking noise paths. Treat them with targeted vibration isolation, added mass/lining, and airtight terminations so footsteps and fan hum don’t travel through framing.
Targeted fixes
- Wrap and isolate stacks
Use mass-loaded vinyl (MLV) or acoustic pipe wrap on vertical drain stacks, then insulate the chase with mineral wool. Support pipes on isolation hangers and decouple from framing to cut structure-borne transfer and water “rush” noise. - Vent fans and ducts the quiet way
Choose quiet bath fans (ECM motors) and run insulated, exterior-terminated duct with a smooth path, sealed joints, and a backdraft damper. Line metal trunks near the room with duct liner to tame mid/high frequencies. - Break the vibration chain at equipment
Add short flexible connectors at air handlers and near rigid duct transitions. Use rubber isolation pads or anti-vibration mounts under fans, dehumidifiers, and pumps so motor buzz doesn’t telegraph into joists. - Seal and harden the mechanical room envelope
Install a solid-core door with perimeter weatherstripping and a drop seal, caulk penetrations with acoustical sealant, and line shared chases. For sumps, use a sealed lid and a quiet check valve to reduce pump cycle noise and hammer.
Floors Above: Impact Noise and Squeaks
Impact noise (footsteps, chair scoots) travels as vibration through the subfloor and joists. Reducing it at the source boosts IIC and means your basement ceiling doesn’t have to work as hard. Tackle fastening and contact points first, then add targeted cushioning where traffic is heaviest.
Upstairs improvements
- Re-fasten the subfloor with screws and construction adhesive to kill squeaks and looseness at joists; add blocking where needed.
- Add acoustic underlayment under LVP or engineered wood in high-traffic zones; look for products with tested IIC/STC ratings, not just foam pads.
- Use area rugs and stair runners with quality pads at hallways, landings, and dining areas to soften heel strike and chair noise.
- During remodels, decouple tight subfloor-to-joist contact where feasible, correct proud fasteners, and eliminate hard mechanical bridges (e.g., shims, nail pops) that transmit vibration.
Doors, Stairs, and Flanking Paths
Even with a great ceiling assembly, sound can “sneak” through weak points such as doorways, open stair runs, soffits, rim joists, and shared chases. These flanking paths bypass your mass and damping layers, letting voices and footfall reappear downstairs. Tightening the envelope with solid-core doors, air sealing, and lined chases preserves your STC/IIC gains and keeps the basement quiet.
Close the gaps
- Upgrade doors: Install solid-core doors with perimeter weatherstripping and an automatic drop seal (door bottom) to stop air and sound leaks.
- Treat stairs: Insulate stair sidewalls, add a solid riser if you have open stairs, and seal stringer interfaces to limit flanking noise.
- Air seal structure: Caulk top plates, rim joists, and all penetrations (wires, pipes, cans) with acoustical sealant; use gasketed boxes at outlets/switches.
- Line soffits/chases: Add mineral wool or acoustic liner inside shared soffits and utility chases so ducts/drains don’t carry sound laterally.
Suggested Assemblies You Can Build
Pick an assembly based on access needs, headroom, and how quiet you want the space to feel. Each option assumes mineral wool or high-density fiberglass in the joists, airtight perimeter sealing, and no open can lights penetrating the ceiling plane.
Assembly A: Max isolation drywall ceiling
For theaters, offices, or bedrooms where you want upstairs noise to drop to a murmur. Highest isolation per inch; least convenient for future access.
- Isolation clips and hat channel to decouple the lid from joists
- 5/8″ drywall + damping compound + 5/8″ drywall (stagger seams)
- Backer boxes or surface/wafer fixtures; 1/4″ perimeter gap sealed with acoustical caulk
- Seal all penetrations; avoid screwing through channel into framing (maintain decoupling)
Assembly B: Access-friendly drop ceiling
Best when you need regular access to valves, junction boxes, or mechanicals. Strong mid/high-frequency control with serviceability.
- Mineral wool above the grid to absorb cavity noise
- High-CAC/NRC acoustic tiles; seal the room perimeter for fewer leaks
- Strategic mass panels above tiles near noise hot-spots (under kitchens/hallways)
- Gasketed access panels and lined chases to limit flanking through soffits/ducts
Assembly C: Budget upgrade
Balanced result when headroom and cost matter. Adds mass and damping without clips; good for family rooms and playrooms.
- Single 5/8″ Type X drywall + damping compound + 1/2″ second layer
- Mineral wool in bays; fastener spacing per spec; seams staggered
- Surface/wafer fixtures with backer boxes; avoid open cans
- Perimeter acoustic seal and careful sealing at boxes, pipes, and sensors
Quick chooser (when to use which)
| Situation | Choose | Why |
|---|---|---|
| Maximum quiet (home theater/office/guest room) | Assembly A | Decoupling + double 5/8″ with damping yields top STC per inch |
| Frequent access to utilities | Assembly B | Grid keeps access; mineral wool + high-CAC tiles control mid/highs |
| Tight budget/headroom, solid improvement | Assembly C | Mass + damping lift isolation without clips; simple to build |
Cost & Timeline in Terre Haute (Quick Glance)
Budgets vary with access, soffits/obstructions, finish level, and how much decoupling (clips + hat channel) you add. These Terre Haute ballparks help plan scope, sequence, and headroom while targeting better STC/IIC performance.
Typical cost ranges (installed)
| Scope | Typical range | Notes |
|---|---|---|
| Clips + hat channel (hardware only) | $3.50–$6.50 / sq ft | Decoupling backbone; add drywall/damping below |
| Double-layer drywall with damping (labor + material) | $3.00–$6.00 / sq ft | Two layers (ideally 5/8″) + viscoelastic compound |
| Mineral wool in joists | $1.20–$2.20 / sq ft | Density > R-value for sound; fills bays edge-to-edge |
| Acoustic drop ceiling (installed) | $6.50–$12.00 / sq ft | Choose high CAC/NRC tiles; seal room perimeter |
What pushes costs up: long soffits, lots of penetrations, tight access, premium finishes, and added backer boxes or specialty access panels.
Typical timeline
| Phase | Typical duration | What happens |
|---|---|---|
| Measure, plan, order | 1 day | Layout, fixture choices, material takeoff |
| Prep, insulate bays, wrap stacks/ducts | 1–2 days | Mineral wool, MLV on stacks, lining noisy chases |
| Install clips/channel or grid; hang first layer | 1–2 days | Decouple structure or set grid; first drywall layer |
| Damping + second layer or tiles; seal & finish | 1–2 days | Apply damping compound, add second 5/8″ or set tiles; perimeter acoustic seal |
Assumptions: clear work area, standard ceiling heights, no major electrical/plumbing reroutes. Variables: inspection timing, change orders, added access panels, or unexpected framing fixes (squeaks, shims).
Frequently Asked Questions On Basement Soundproofing
Do I need isolation clips, or will double 5/8″ drywall be enough?
Double 5/8″ with a damping compound is a big upgrade. Adding isolation clips + hat channel (decoupling) further improves low-frequency control and overall comfort. Best choice under kitchens, living rooms, or play areas.
How much headroom will I lose with a soundproof ceiling?
Clips + channel typically adds ~1–1.5″, each 5/8″ drywall layer adds ~⅝”. Most “max isolation” builds land around 2–3″ total, depending on channel depth and backer boxes.
How do I quiet plumbing and duct noise?
Wrap vertical stacks with MLV/acoustic pipe wrap, line chases with mineral wool, use quiet ECM bath fans with insulated, exterior-terminated duct, and add flex connectors near equipment to break vibration paths.
Will a drop ceiling hurt soundproofing?
Not if built right. Use mineral wool above the grid, specify high CAC/NRC acoustic tiles, seal the perimeter, and add mass panels over noise hot-spots. You’ll keep access and get solid mid/high-frequency control.
What’s the best insulation for joist bays—mineral wool or fiberglass?
For sound, mineral wool (rock wool) sound attenuation batts win on density and fit. High-density fiberglass is a good budget alternative. Fill bays gently, don’t compress around wires/pipes.
What does a soundproof ceiling cost in Terre Haute?
Ballparks: clips + channel hardware $3.50–$6.50/sq ft, double-layer drywall with damping $3.00–$6.00/sq ft, mineral wool $1.20–$2.20/sq ft, or $6.50–$12.00/sq ft for a quality drop ceiling. Access, soffits, and finish level drive totals.
Need further assistance?
Unsure about something? Get in touch with us for a personalized consultation.
Ready to Make Your Basement Quiet?
Turn between-floor noise into a whisper with a sound plan designed for your layout, headroom, and budget, and built to pass inspection the first time. We’ll map clips/channel vs. drop ceiling options, treat plumbing/duct flanking, and give you a clear line-item estimate before any dust.
Serving Terre Haute, Clinton, Rockville, and surrounding areas.