How to Fix Sinking Deck Posts: Diagnose, Repair & Prevent
Sinking deck posts are a common structural problem that often starts small and grows into a safety issue. Posts typically sink because the footing is undersized, the post base has rotted, or seasonal frost and poor soil compaction have shifted bearing soil. This guide focuses specifically on posts and footings: how to diagnose the cause, temporary stabilization you can apply immediately, proven permanent repairs, cost ranges, and prevention tips tailored for Terre Haute and surrounding Indiana towns.
What this guide covers
TL;DR: This guide shows how to diagnose sinking deck posts, stabilize them safely, and perform long-lasting post and footing repairs, with practical cost ranges and local permitting notes for Terre Haute and other Indiana towns.
Patriot Property Pros is based in Dana and proudly serves Terre Haute, IN and nearby Vigo County towns for deck inspections and post repairs.
If you’ve found leaning posts or gaps at the ledger, this page walks you through the full repair workflow: quick diagnostics to identify the root cause, safe temporary stabilization you can do before major work, permanent footing and post solutions that stop re-settlement, and realistic cost and permit expectations. The steps are practical whether you plan a DIY repair or want a contractor quote and they’re tuned for Indiana climates and frost depths.
- Diagnose the root cause — how to tell if the issue is rot, undersized footings, frost heave, or poor soil compaction (with quick tests you can perform).
- Temporary stabilization — immediate, safe actions (adjustable jacks, cribbing, bracing) to prevent further damage while you plan repairs.
- Permanent post & footing repairs — prioritized solutions (new concrete piers, sonotubes, galvanized bases, helical piers) with step-by-step sequencing.
- Costs, permits & prevention — expected price ranges, when a permit is required in Indiana, and simple deck maintenance steps to stop recurrence.
If you are needing a deck fixed or repaired please look at our custom deck building page.
Why deck posts sink
TL;DR: Sinking deck posts happen when the load path to stable, undisturbed soil is lost, usually from shallow/undersized footings, frost heave, rot, or poor drainage and fixing only the post rarely stops the problem unless you restore proper footing and drainage.
Sinking deck posts (post settlement) occur when the support beneath the post no longer bears on competent soil. Common causes include footings set too shallow or on fill, seasonal frost heave, rot at the post base where water collects, and corroded connectors that let the load shift. In many Indiana yards, including Terre Haute poor drainage or posts set on topsoil speeds failure. Replacing a rotten post without addressing footing depth, soil compaction, or drainage usually leads to repeat settlement.
Common causes
- Undersized or shallow footings — pier on fill or topsoil; look for cracked/piers or lateral movement.
- Frost heave / freeze–thaw cycles — seasonal up/down movement and concrete cracking.
- Rot at the post base — soft, discolored wood or insect activity where post meets ground.
- Corroded connectors & poor drainage — rusted brackets, pooled water, or downspouts discharging near posts.
How to diagnose sinking posts (what to inspect)
TL;DR: Measure post tops, probe for rot, inspect the footing condition, and check nearby drainage before planning repairs.
Diagnosing correctly saves time and money because it tells you whether you need a simple splice, a new pier, or an engineered underpinning. Start with a visual sweep and a measurement of the post tops versus a stable interior reference (laser level or string line works well). If the footing is hidden, dig a small test hole to expose the pier and confirm depth and bearing soil. Record your findings, elevation differences, rot extent, concrete condition, and nearby water sources so you or a contractor can scope the right repair.
Common inspection checks (do these in order)
- Measure vertical variance — measure post-top height against a fixed interior reference or use a laser level to quantify settlement in inches.
- Probe for rot and movement — use a screwdriver or pry bar at the post base; soft wood, crumbling fibers, or lateral play mean replacement or splice is needed.
- Inspect the footing — dig to expose the pier; look for cracked, heaved, or undersized concrete and confirm whether the footing bears on undisturbed soil.
- Check drainage & site conditions — note downspout discharge, soil slope toward posts, pooling water, and vegetation that traps moisture around bases.
Quick tools checklist (bring these)
- Tape measure and laser level or straightedge/string line
- Shovel for a small test excavation and a pry bar for rot testing
- Waterproof flashlight and camera (photo each pier and post for records)
- Marker or notepad to record elevation differences and observations
Temporary stabilization — safety first
TL;DR: Stop further movement immediately with two adjustable jacks, solid cribbing, and cross-bracing. Never work under an unsupported span.
Before cutting or moving anything, stabilize the deck so repairs are safe. Temporary shoring is about transferring load off the problem post and locking the frame in place long enough to inspect and plan a permanent fix. Use redundant supports and work slowly — sudden lifts or single-point props can shift loads and damage the deck or house connection.
Immediate stabilization steps (do these in order)
- Install two adjustable steel deck jacks under adjacent beams and place solid cribbing (treated 4x4s or 2x8s) on a firm bearing pad to transfer load safely.
- Add a temporary support under the ledger or beam near the problem post — protect siding/ledger with plywood and use a wide bearing surface.
- Cross-brace nearby posts with 2×4 diagonals or straps to reduce lateral movement while you work on the footing.
- Use redundant shoring and slow lifts — never rely on a single prop; raise or lower in small increments (¼”–½”) and re-crib before working under the deck.
Tools & materials checklist (bring these)
- Adjustable steel deck jacks (rated for house/deck loads)
- Pressure-treated lumber for cribbing (4x4s, 2x8s) and plywood pads
- Concrete pavers or steel base plates for stable bearing surfaces
- Personal protective equipment (hard hat, gloves) and ratchet straps for temporary bracing
Quick safety warnings
- Do not work directly under an unsupported span.
- Lift slowly and evenly; sudden movement can tear connectors or split wood.
- If the ledger is suspect or the house connection shows rot, stop and call a pro — the house framing may be compromised.
- Avoid working alone; have a spotter and use proper PPE.
Permanent repairs — prioritized, durable methods
TL;DR: Restore the load path with new piers or engineered anchors, elevate posts on galvanized bases, and protect connections from moisture and corrosion.
Permanence means restoring the post to stable bearing and protecting the wood and connectors from moisture and corrosion. The sequence below is the most reliable approach for Indiana conditions, adapt to local code, frost depth, and soil. Follow the order: expose the problem, assess the timber and connector condition, rebuild the bearing below frost depth (or use an engineered alternative), then finish with long-life connectors and moisture protection.
1) Excavate and expose the footing
Carefully dig around the post base until you can see the existing footing or confirm the post is bearing on topsoil. This reveals whether the original pier is undersized, cracked, heaved, or missing; don’t guess from surface symptoms alone. Photograph each exposed condition and record footing diameter and visible depth.
Practical steps
- Excavate just enough to expose the pier and post base (minimize disturbance to adjacent soil).
- Note cracking, voids, or signs of freeze movement; measure approximate depth to competent soil.
2) Assess rot and post condition
Check the post where it meets the base and any connectors between post and beam. If the wood is soft, flaky, or shows long-term discoloration, cut back to sound material and decide between a splice (sister) or full post replacement. Use pressure-treated lumber for any new wood and follow manufacturer or code guidance for splice connections.
Repair options
- Splice/sister a new treated section when sound wood remains above the decay line.
- Replace the post when the base or splice area is compromised or when code/loads require a full replacement.
3) Underpin or pour a new concrete pier to frost depth
For most reliable long-term performance, establish a new pier bearing on undisturbed soil below frost. Typical Indiana practice calls for bearing below common frost depths (often 30–36 inches), but always confirm with your local building inspector.
Concrete pier sequence
- Dig to undisturbed bearing soil to the required depth.
- Set an appropriately sized sonotube (commonly 12–16″ diameter for single-post loads) and add reinforcement per local practice.
- Pour concrete and allow initial set/cure per product guidance before loading the pier (follow contractor guidance for working times).
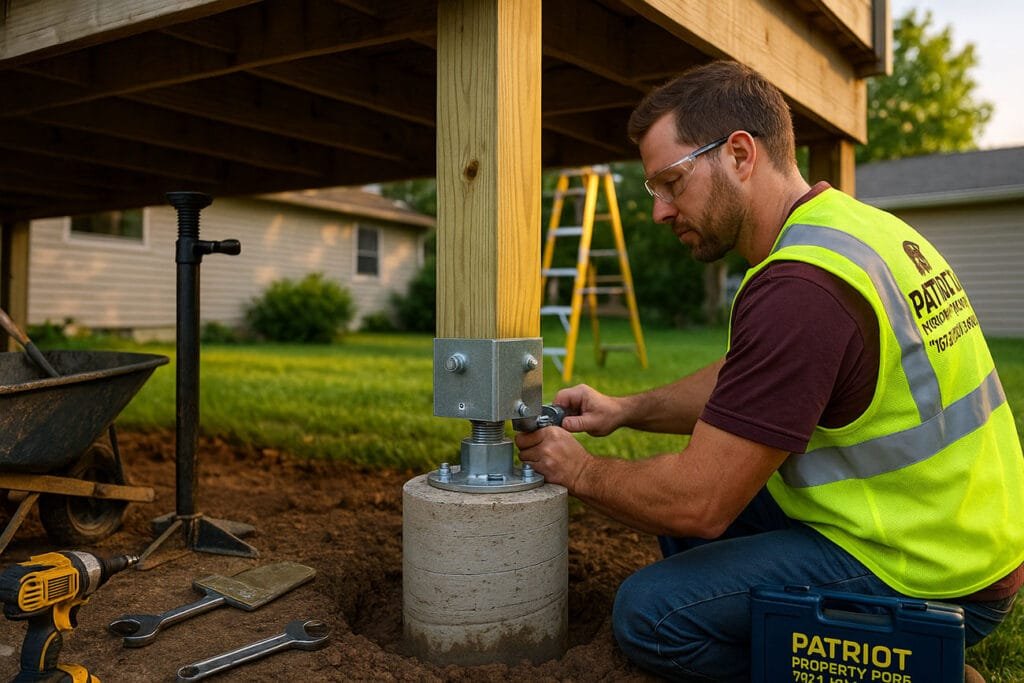
- Anchor an adjustable galvanized post base to the cured pier and position the post so the wood does not sit directly on concrete.
4) Alternatives for difficult soils or repeat movement
When soils are poor or the site shows repeated heave/settlement, engineered solutions can avoid repeated repairs and often reduce long-term cost.
Engineered alternatives
- Screw (helical) piers to transfer loads below problem strata without deep excavations.
- Underpin or replace multiple adjacent piers to redistribute loads rather than repairing single posts in isolation.
- Combine sistering with new piers as a staged repair when access or budget limits full replacement.
- Engage a structural contractor or geotechnical pro for widespread settlement or complex site conditions.
Finish the repair by using exterior-rated galvanized or stainless post bases and fasteners, keeping wood elevated above concrete, and restoring drainage away from the footing so the repair lasts.
Fasteners, post bases and corrosion protection
TL;DR: Use exterior-rated galvanized or stainless connectors, lift wood off concrete with a rated post base, and match fasteners to treated lumber to prevent corrosion.
Durable connections are as important as solid footings. Modern treated lumber (ACQ and newer treatments) is more corrosive to ordinary steel, so choose hardware rated for exterior use and compatible with treated wood. Avoid embedding wood into concrete, always use a manufactured post base or column anchor that elevates the wood, provides a bolted connection, and keeps water away from the timber end grain.
Key hardware & installation tips (practical)
- Choose the right metal: use hot-dipped galvanized (G185) or 300-series stainless steel for connectors, bolts, and screws exposed to the elements.
- Use through-bolts or structural screws: prefer galvanized or stainless carriage/hex bolts with washers for post-to-base connections; follow manufacturer torque specs.
- Keep wood off concrete: install a rated post base or adjustable column anchor so the post sits above the pier and water drains away.
- Protect cut or exposed wood: apply end-grain preservative to any saw cuts and flash or caulk where the post meets siding or trim to prevent water intrusion.
Installation reminders
- Verify connector load ratings and compatible fastener sizes in the product datasheet.
- Avoid mixing incompatible metals (e.g., plain steel fasteners with stainless connectors) to prevent galvanic corrosion.
- Replace visibly corroded brackets — rusted connectors can shift loads and accelerate failure.
- Consider galvanized anchor bolts with neoprene washers in splash-prone locations for extra protection.
Finish by inspecting and documenting the new connections with photos and notes so future inspections can spot early corrosion or movement.
Costs, permits & what to expect
TL;DR: Expect $250–$900 per simple post repair; bigger jobs or engineered solutions can run into the thousands—permits may be required.
Actual cost depends on several site-specific factors: footing depth (frost depth increases cost), soil type (rocky or poor soils raise price), site access (tight yards or steep grades need more labor), and how many posts must be corrected. Finish work (landscape repair, staining, decking patching) and required inspections add to the total. Get itemized quotes so you can compare labor, materials, equipment, and permit fees.
Typical cost ranges (use these as planning numbers)
- Single post replacement: $250–$900 (new pier, galvanized anchor, and post work).
- Multiple posts / partial repair: $900–$2,500 (larger crew/time, mobilization, restricted access ups cost).
- Engineered underpinning / helical piers: $2,500–$6,000+ (for poor soils, widespread settlement, or structural fixes).
- Additional site costs: $100–$800+ (landscape restoration, stump/obstacle removal, concrete disposal, and inspection fees).
Permits & local rules (what to do)
- Many Indiana jurisdictions (including city/town building departments serving Terre Haute-area homeowners) require permits for footings below frost depth or any structural/footing alteration, check with your local building office before digging.
- Ask the contractor to include permit pulls and inspector coordination in the bid (or confirm you will handle permits yourself).
- Expect an inspection to verify footing depth, rebar/anchor placement, and final anchored connections before final approval.
How to reduce surprises
- Get 2–3 written, itemized quotes that separate materials, labor, equipment, and permit/inspection costs.
- Ask contractors for photos of existing conditions and a short scope-of-work describing whether they’ll underpin, pour new piers, or use helical piers.
- Budget a contingency (10–20%) for hidden conditions, rot below grade, unexpected utilities, or soil problems that only show once you excavate.
Prevention & maintenance (stop it from coming back)
TL;DR: Improve drainage, keep wood off concrete, use corrosion-resistant connectors, and inspect after winter to catch problems early.
Simple, routine maintenance prevents most repeat settlement and extends the life of your repairs. Small changes—redirecting downspouts, adding gravel pads, or swapping corroded brackets—avoid the expensive cycle of repair, re-repair, and undermined warranties. These steps are low-cost and particularly useful in climates with freeze–thaw seasons (common around Terre Haute).
Four practical prevention steps
- Improve drainage — regrade soil to slope away from posts, add gravel or crushed stone pads under post bases, and ensure downspouts discharge well away from the deck.
- Use durable connectors — replace old, rusted brackets with hot-dipped galvanized or 300-series stainless steel hardware rated for treated lumber.
- Keep wood elevated — maintain a visible gap between post bottoms and concrete; always use a rated post base or adjustable column anchor.
- Annual post-winter inspection — check for movement, pooled water, cracked piers, and early corrosion; document changes with photos so trends are visible.
Quick tip: small preventative fixes now (gravel pads, a new bracket) often cost a fraction of a full footing repair later.
When to call a pro
TL;DR: Hire a licensed contractor when multiple posts or the ledger are failing, movement repeats after repairs, or permit/engineered work is required.
Call a licensed contractor when you see danger signs or complexity triggers. A pro will diagnose load redistribution, document conditions for permits, recommend engineered solutions (if needed), and coordinate inspections. Early contractor involvement can prevent a small repair from turning into a full rebuild.
Common warning signs that need a pro (get help if any apply)
- Multiple posts settled or whole-deck sagging — indicates redistributed loads and possible structural framing issues.
- Rot at the ledger or inside joists — compromised house connection is a serious safety and moisture issue.
- Repeated movement after repairs — suggests poor soils or drainage that may need geotech or engineered foundations.
- Required permit work or deep footings — work below frost depth, engineered piers/helical anchors, or structural changes usually require a pro and inspections.
What a good contractor will do for you (quick)
- Perform a measured inspection and document existing conditions with photos and elevations.
- Provide an itemized scope and options (splice, new piers, helical piers, partial rebuild).
- Pull permits, schedule inspections, and install code-compliant footings and connectors.
- Supply before/after photos and a short maintenance plan to protect the repair.
Frequently Asked Questions On Deck Posts
What exactly causes deck posts to sink?
Most sinking-post problems trace back to a failed load path between the deck and competent soil. Common causes are footings set too shallow or placed on loose fill/topsoil, freeze–thaw (frost heave) that lifts and then allows uneven settling, rot at the post base from trapped moisture or poor flashing, and corroded metal connectors that let load shift to weaker elements. Frequently multiple factors combine (for example, poor drainage plus an undersized pier). A measured inspection to determine footing depth, probe for rot, and check concrete for cracking or heave tells you which failure mode to fix.
How much should I expect to pay to fix a sinking deck post?
Costs depend on footing depth, soil conditions, access, and number of posts. Typical planning ranges: single post replacement with a new concrete pier and galvanized anchor: $250–$900; multiple-post or restricted-access repairs: $900–$2,500; engineered underpinning or helical piers for poor soils or widespread settlement: $2,500–$6,000+. Ask for itemized quotes (labor, materials, equipment, disposal, permit fees) and budget a 10–20% contingency for hidden issues such as rot below grade or buried obstacles revealed during excavation.
How do I safely stabilize a deck before repairs?
Safety-first stabilization uses redundant shoring to transfer load away from the failing post. Typical safe steps: place two adjustable steel deck jacks on firm bearing pads under adjacent beams, build solid cribbing with pressure-treated lumber, add a temporary support under the ledger or nearby beam (protect siding with plywood), and install cross-bracing between posts to prevent lateral movement. Lift or lower in small increments (¼”–½”), re-crib after each adjustment, and never work directly under an unsupported span. If you’re unsure about load paths or the house connection, hire a pro to shore it safely.
Can I replace a rotten post without taking the deck apart?
Often yes, for a single post when beams and ledger are otherwise sound. The typical process is: shore the deck with two adjustable jacks and solid cribbing, expose the post base, cut back to sound wood, then either splice (sister) a treated post section or replace the post in place on a properly anchored post base. However, if the footing is undersized, the ledger or joists are rotted, or the house connection is compromised, an in-place repair is likely temporary and you may need a partial disassembly or new piers for a permanent fix. Always confirm footing condition before assuming an in-place splice is sufficient.
Do I need a permit, and what is the required frost depth in Indiana?
Permit rules vary by jurisdiction. Many Indiana towns require permits for structural footings or work below frost depth; common frost depths in Indiana are often around 30–36 inches, but you must confirm the exact local requirement with your city or county building department (Terre Haute or your township). Ask contractors to include permit pulls and inspection coordination in their bids, or check with the local office if you plan to manage permits yourself.
What maintenance prevents sinking posts from returning?
Routine, low-cost maintenance prevents most repeat settlement: improve drainage (regrade soil to slope away, add gravel/crushed stone pads around posts, and ensure downspouts discharge away from the deck), replace corroded brackets with hot-dipped galvanized or stainless hardware, keep wood elevated above concrete using rated post bases or adjustable column anchors, and perform an annual post-winter inspection for movement, pooling, cracked piers, or early connector corrosion. Addressing small drainage or connector issues early avoids expensive footing work later.
Need further assistance?
Unsure about something? Get in touch with us for a personalized consultation.
Request a Free Deck Post Inspection in Terre Haute
Don’t wait, a sinking post can quickly become a safety hazard. Call Patriot Property Pros or click Get Estimate for a free on-site inspection, photos, and a written repair plan with a fixed-price quote.
Serving Terre Haute, Clinton, Rockville, and surrounding areas.